January |
Access |
War in Palestine: Gaza to Jerusalem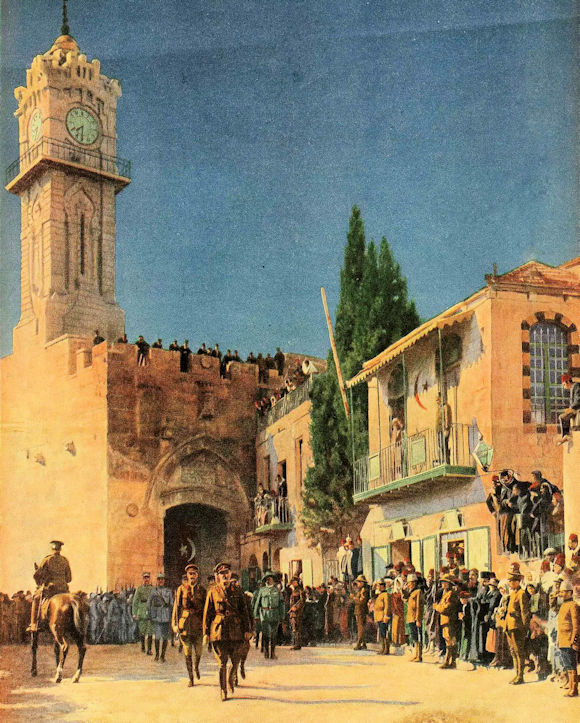 General Allenby Enters Jerusalem on Foot,
|
||||||||


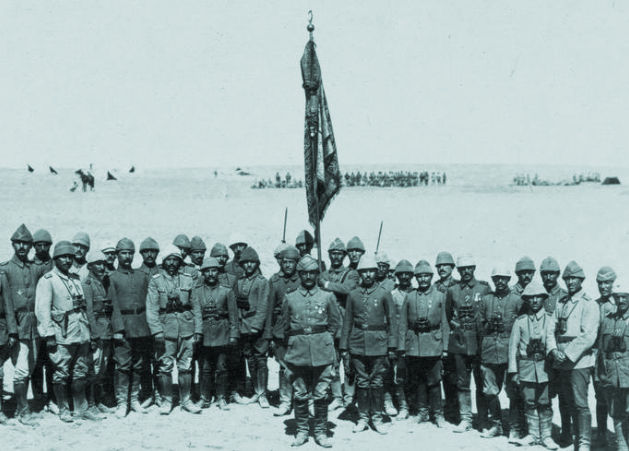
New EEF Commander
|
Back on the Western Front, Lt. General Edmund Allenby's Third Army had minimal responsibility for 1916's Battle of the Somme. The following year, however, it had principal responsibility for the British portion of the main Allied initiative. Third Army was to drive east from Arras and hopefully hook up with the French forces of General Nivelle, which were to be concurrently attacking the Chemin des Dames and breaking through from the south.
His plans, however, were undermined by the German retreat to their new defenses along the Hindenburg Line. Allenby's superior, General Haig, refused his request for a delay to allow for re-planning the offensive
At first, though, the Arras offensive went well with the Third Army breaking through the German lines and advancing three and a half miles in one day. However, the Germans reinforced the sector and sent staff officers with expertise in defensive tactics. There followed weeks of heavy fighting that deteriorated into trench-fighting positional warfare with heavy casualties to Third Army. Allenby and Haig mutually lost confidence in one another. Haig expressed the opinion that Allenby "was lacking in aptitude for high command." His time on the Western Front was not to extend much
longer.
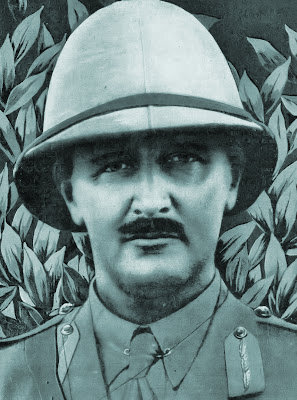
Allenby was dismayed by the criticism he was receiving, but his skills were better suited for open warfare than the trenches and no one appreciated this more than the Chief of the Imperial General Staff William Robertson. Earlier in 1917, the Egyptian Expeditionary Force, under the command of Sir Archibald Murray, was having problems. It failed twice in its efforts to take Gaza. Murray's failure at Second Gaza left officials in London no choice but to replace him with a commander who could achieve much-needed results in an otherwise gloomy war effort. Prime Minister David Lloyd George initially offered command to Gen Jan Smuts, but the South African declined in the belief that he would not receive support from the War Office for a "sideshow" effort. Upon Chief of Staff Robertson's recommendation, command fell to Gen Allenby. He was relieved of command of the Third Army, awarded a fourth star, and sent to relieve General Murray.
After arriving in Egypt on 27 June 1917, Allenby kept up a vigorous pace his first few weeks in theater, visiting units, making corrections, and developing a general framework for his first campaign His temper and impatience soon became legendary. One division commander said, "What angered him was stupidity, negligence, and, most of all, disregard of orders." War correspondent Hamilton Fyfe described his arrival at his new assignment:
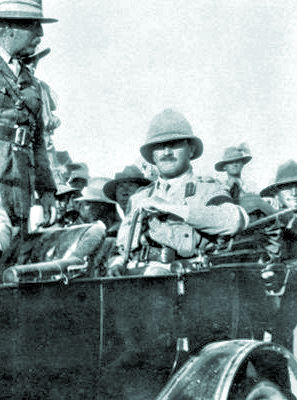
Out Inspecting the Forces
He found the Turks strongly entrenched, and our men entrenched just as strongly opposite to them—position warfare in its most tedious form. Headquarters had been in Cairo, 300 miles away, and it seemed as if stagnation might continue forever. With Allenby's coming the atmosphere changed. He declined to stay in Cairo. He trundled across the desert in a Ford car and set up his headquarters in a wooden hut ten miles from the front line. He set to work at once to organize railways and make roads. He commandeered all the beer in Egypt for his thirsty troops and road-makers. Over [the next] four months he prepared to strike a heavy blow.
While logistical constraints such as water supplies dominated operational maneuver in Palestine, the desert offered opportunities not found on the exhausting Western Front. It would be a war of movement, the type of fighting Allenby was most suited for. His first challenge, however, was the same that had frustrated him at the Somme and Arras. Turkish defenders and their German advisers ensured there were at least some parallels to the fighting in the West. Around Gaza, the trench system that had defeated his predecessor at Gaza was still deadly and elaborate. How would Allenby choose to capture Gaza and clear the road to Jerusalem?
Sources: Over the Top, June 2010
Visit Our Daily Blog
Click on Image to Visit
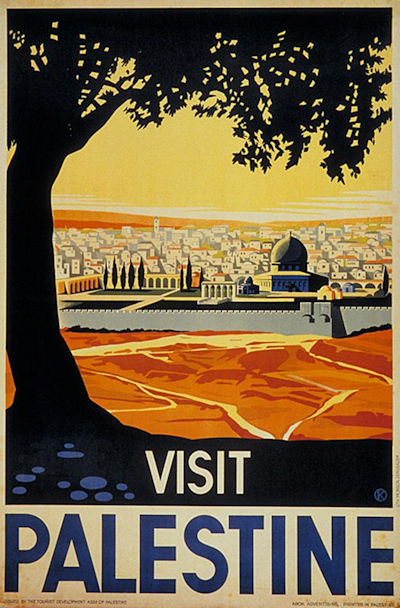
Pre-WWI Travel Poster

Different Perspectives
Various looks at the Great War in Palestine.
![]() World War I and Britain's 1917 Middle East Campaigns (Video)
World War I and Britain's 1917 Middle East Campaigns (Video)
![]() How the Allied Campaigns in the Sinai and Palestine Were Atypical
How the Allied Campaigns in the Sinai and Palestine Were Atypical
![]() World War I and After in Palestine
World War I and After in Palestine
![]() Mutasarrifate of Jerusalem
Mutasarrifate of Jerusalem
![]() Biographical Sketch of General Sir Archibald James Murray
Biographical Sketch of General Sir Archibald James Murray
![]() Edmund Allenby 1917: A Scapegoat in the Spring, A Rising Star in the Fall
Edmund Allenby 1917: A Scapegoat in the Spring, A Rising Star in the Fall
![]() Remembering the Founders of the Jewish Legion
Remembering the Founders of the Jewish Legion
![]() Edmund Allenby: The Bull
Edmund Allenby: The Bull
![]() Water Usage in Desert Operations
Water Usage in Desert Operations
![]() Camels at War
Camels at War
Failure at Gaza
Meanwhile I heard of Allenby's excellence, and of the last tragedy of Murray, that second ,which London forced on one too weak or too politic to resist; and how we went into it, everybody, generals and staff-officers, even soldiers, convinced that we should lose. Five thousand eight hundred was the casualty bill. They said Allenby was getting armies of fresh men, and hundreds of guns, and all would be different.
T.E. Lawrence, Seven Pillars of Wisdom
Free Publications |
||
|
Amazon.com |
||
How Important Was the Arab Revolt?
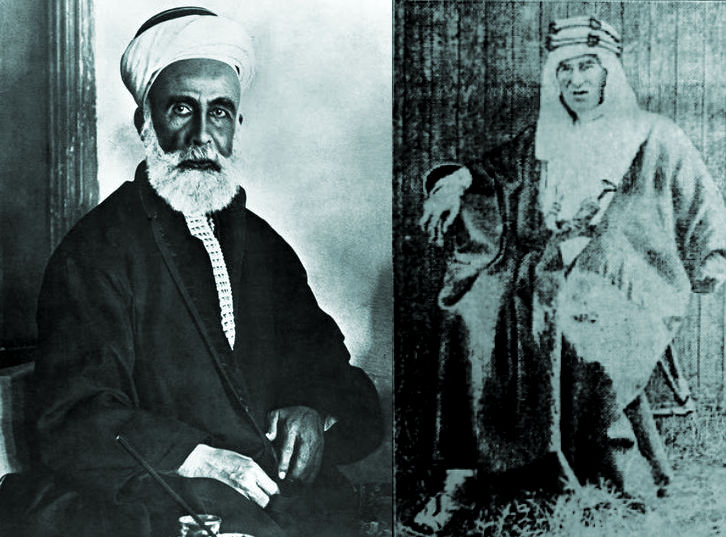
Hussein and Lawrence
Very important to Allenby's eventual success argues Neil Dearberg, author of Desert Anzacs. Among the points he raises:
Source: The Arab Revolt, 1916–1918: Success or Suspect?
By Neil Dearberg
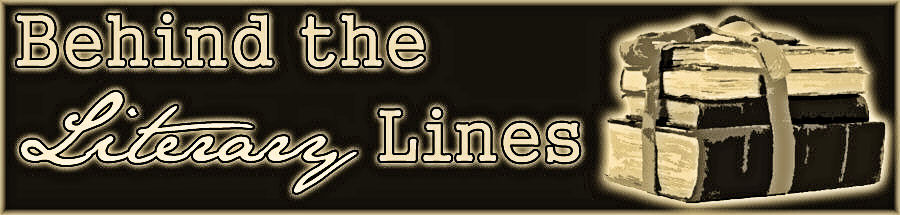
On the Campaign Trail in Palestine
Men of the EEF at the
Lions' Gate, Jerusalem
After a spell in the Signal School at Cleopatra Camp, I was drafted to the 74th Divisional Signal Company which was then being formed. My first experience of war was at the Second Battle of Gaza when we were in reserve.
It was a nightmare of interminable marching, thirst, and tiredness. On the third day of this commotion, I was on a cable wagon which was picking up a line in order to lay it again wherever needed.
September of this year (1917) found us on the borders of Palestine. The chief hardship was lack of water—a good wash was a luxury. Our final preparations for the advance took place in a sandstorm. For three days we were working with goggles over our eyes and handkerchiefs round mouth and nostrils.
The job was recovering and loading cable ready for the dash up. It was impossible to see a man 20 yards away; there was sand all over our perspiring bodies, sand on every mouthful of food we ate, and a sip of tepid water left sand on our lips. Half the fellows were suffering from dysentery pains and passing blood.
The storm ceased, and we had a clear and beautiful night. We washed, and we stretched ourselves under the stars utterly content with just the absence of physical discomfort. I have had the same feeling in miniature when a tooth has stopped aching. The noise of the bombardment added a pleasurable touch of excitement. We felt things were afoot.
Morning saw us setting off in earnest. Curiously enough, it was the drivers who suffered most from the sand, and it was a job getting men well enough to sit the horses.
My pal and I found ourselves riding in an eight-horse cable team. It was an exciting ride. Straight down the side of a wady and top speed at the opposite bank before the momentum was spent.
About midday we clattered through Gaza, an untidy dilapidated Gaza from which most men had fled. Here and there a dark face peeped stealthily from a doorway, but, apart from the troops hurrying through, it was a place of desolation.
Yet I felt an indescribable sense of elation riding through this town heaped with the debris of war; an elation akin to those lines of Macaulay's about the thick, black cloud of smoke going up from a conquered town; an elation that seemed to have no basis in reason.
North of Gaza we off-saddled for a meal. We found a patch of grass on which both men and beast rolled for pure enjoyment. While we were eating a man and woman came trudging along the way. They were of village Bedawi type and looked hard-pressed. They sat down as though waiting for any leavings. The woman had a baby.
My pal and I had a half tin of condensed milk, and we slipped over casually, and soon had the baby sucking it off biscuit. The man grinned and nodded when we gave him the rest of the tin, but the woman looked at us without saying a word. Although she was Mohammedan, she made no attempt to draw her veil. She just looked at us. I don't think we fitted in with her notion of invading soldiers.
We trekked northwards, rigging up signal offices wherever we stopped until we settled down in the Wady Surar as a transmitting office to the divisions.
It was a mud and misery winter. Supply lorries were stuck fast in the mud, and supplies often scarce. Our Christmas Day ration was two biscuits, a tin of bully to four, and a tin of jam to seventeen men. We were sleeping in wet clothes, and even sleep was scarce, as pressure of work in the signal office necessitated us working all through every alternate night. I had the additional misery of neuralgia.
Three telegrams I handled that winter stick in my memory. One from General Allenby to the 60th Divisional General when Jerusalem was taken.
It read "Congratulations. Psalm 122, v. 2". I looked it up. "Our feet shall stand within thy gates, O Jerusalem." I thought it rather decent of Allenby.
Source: A Sapper at War, H.P. Bonser, Royal Engineers
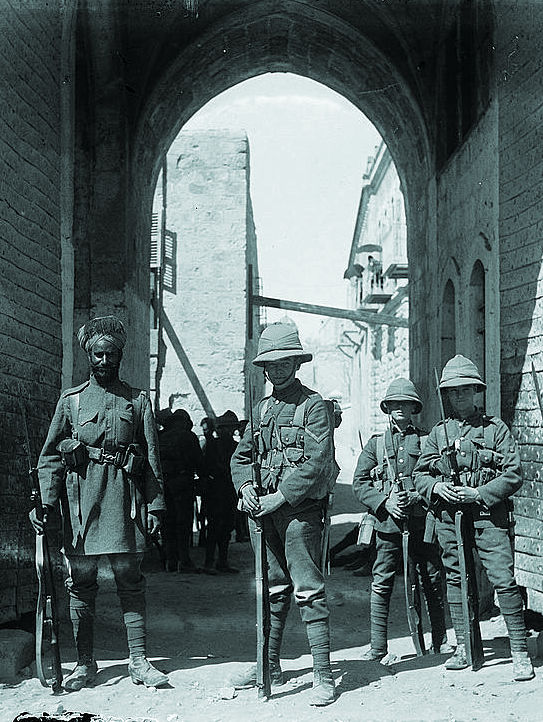
British Cemetery South of Gaza
Third Gaza and Beersheba
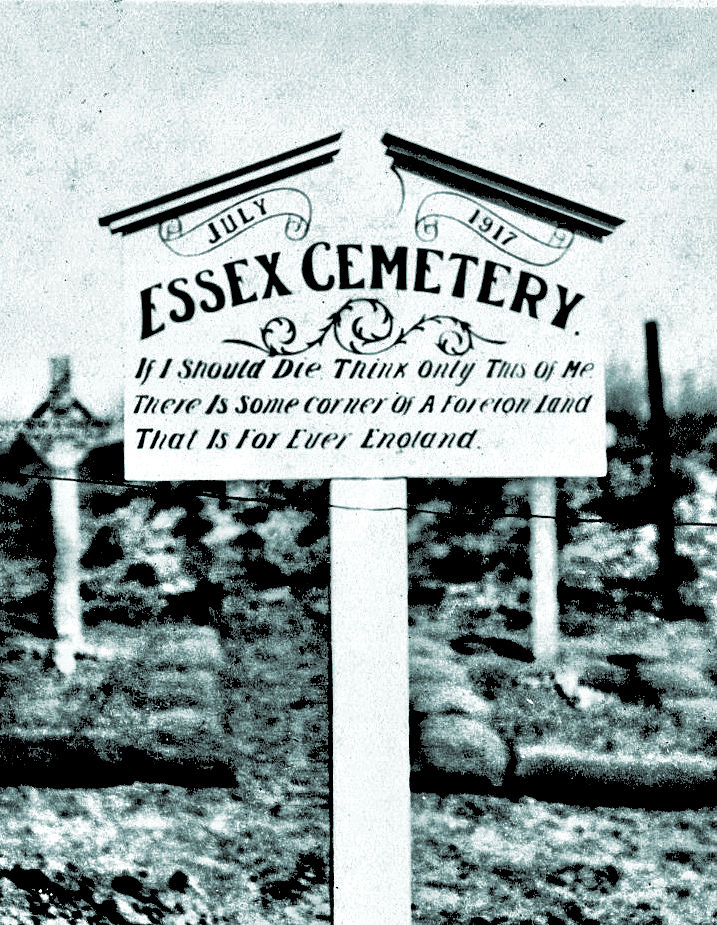
British Operations: Gaza through Jerusalem, 1917
Six months after his predecessor’s second failure, Lieutenant-General Sir Edmund Allenby drew up an ambitious plan to take Gaza and break through the Ottoman line into southern Palestine. Allenby, a career cavalryman, sought to make the most of his advantage in mounted troops. Mindful of the lack of water and the strength of the Ottoman positions (now defended by the Ottoman Seventh and Eighth armies), he proposed to attack in three phases over a number of days.
The main thrust would be directed against Beersheba, which would be captured by the Desert Mounted Corps and 20 Corps. The most important goal of this operation was to capture the wells intact. With the horses watered, the second phase would see 21 Corps attack the outer defenses of Gaza to pin down the garrison there. Meanwhile, 20 Corps would move against the Hareira–Sheria area while the Desert Mounted Corps captured the wells at Tel el Negile.
Once these objectives were taken the last phase could begin. The Desert Mounted Corps would move westward to take Huj and reach the coast behind Gaza, cutting off the 46,000 Ottoman troops pinned down along the Gaza–Beersheba axis by 20 and 21 Corps’ attacks. Allenby didn’t want to just break through the Ottoman line—he wanted to destroy the two armies defending it.
The charge of the 4th Australian Light Horse at Beersheba that took place late in the afternoon of 31 October 1917 is remembered as the last great cavalry charge. The assault on Beersheba began at dawn with the infantry divisions of the British XX Corps attacking from the south and southwest. Despite artillery and air support, neither the infantry attacks from the south nor the Anzac Mounted Division’s attack from the east had succeeded in capturing Beersheba by mid-afternoon.
With time running out for the Australians to capture Beersheba and its wells before dark, Lieutenant General Harry Chauvel, the Australian commander of the Desert Mounted Corps, ordered Brigadier General William Grant, commanding the 4th Light Horse Brigade, to make a mounted attack directly toward the town. Chauvel knew, from aerial photographs, that the Turkish trenches in front of the town were not protected by barbed wire. However, German bombing had forced the 4th Brigade into a scattered formation, and it was not until 1650 that they were in position. The brigade assembled behind rising ground six kilometers southeast of Beersheba with the 4th Light Horse Regiment on the right, the 12th Light Horse Regiment on the left, and the 11th Light Horse Regiment in reserve.
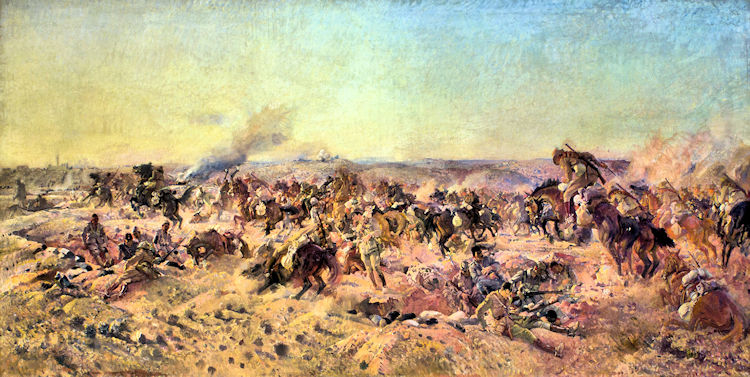
Australian Charge at Beersheba
The Australian Light Horse was to be used purely as cavalry for the first time. Although riders were not equipped with cavalry sabers, the Turks who faced the long bayonets held by the Australians did not consider there was much difference between a charge by cavalry and a charge by mounted infantry. The Light Horse moved off at the trot and almost at once quickened to a gallop. As they came over the top of the ridge and looked down the long, gentle open slope to Beersheba, they were seen by the Turkish gunners, who opened fire with shrapnel. But the pace was too fast for the gunners. After three kilometers, Turkish machine guns opened fire from the flank, but they were detected and silenced by British artillery. The rifle fire from the Turkish trenches was wild and high as the Light Horse approached. The front trench and the main trench were jumped and some men dismounted and then attacked the Turks with rifle and bayonet from the rear. Some galloped ahead to seize the rear trenches, while other squadrons galloped straight into Beersheba. This epic charge broke the back of the Ottoman defense. The Anzac mounted troops were soon swarming through the streets of Beersheba, which was secured within an hour.
Nearly all the wells of Beersheba were intact and further water was available from a storm that had filled the pools. The 4th and 12th Light Horse casualties were 31 killed and 36 wounded; they captured over 700 men. The capture of Beersheba meant that the Gaza-Beersheba line was turned. Gaza was now vulnerable.
Now Gaza
When the second phase of the battle got underway, the focus of British efforts switched to Gaza’s outer defenses. A general artillery and naval bombardment had begun on 27 October. After this prolonged softening-up period, the infantry of the 54th (East Anglia) and 52nd (Lowland) Divisions carried out a series of coordinated assaults on 1–2 November against the narrow coastal strip of giant sand dunes on the right flank of Gaza’s defenses. These attacks penetrated so deeply into the Ottoman line that it seemed that 21 Corps was about to outflank the Gaza defenses single-handed. This would be the limit
of the Turkish advance.
Allenby’s plan now began to unravel through a combination of bad luck and strong Ottoman rearguard actions. The wells at Beersheba were insufficient to meet the demands of the whole Allied force, whose needs had been increased by the ill-timed arrival of a khamsin (a hot, dry wind from the desert).
Logistical problems caused by the lack of water delayed the start of the third phase until 6 November. In the interim, the commander of the Ottoman Seventh Army, Fevzi Pasha, regrouped his forces—now augmented by survivors of the Beersheba garrison—and mounted local counterattacks. Assaults on the Hareira and Sheria redoubts by the infantry of 20 Corps succeeded only after bitter fighting in which both sides suffered heavy casualties.
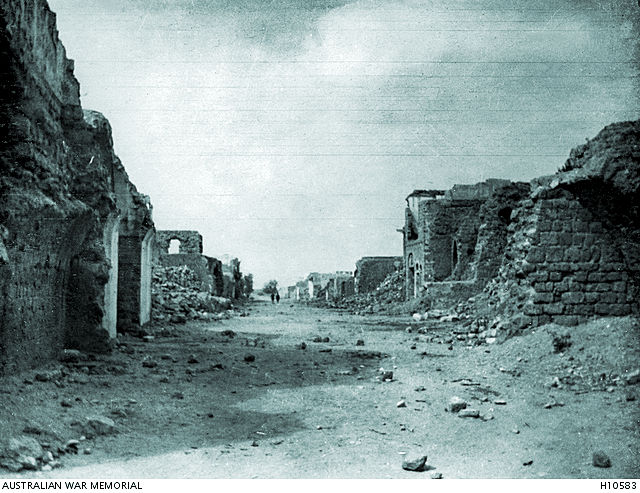
Main Street of Gaza After Its Capture
In the meantime, the commander of the Ottoman Eighth Army, Kress von Kressenstein, had finally recognised the danger of his forces being cut off in Gaza. Knowing thatz he had no more reserves to commit to the battle and doubting the Seventh Army’s ability to hold Hareira–Sheria for long, the German commander ordered his troops to begin evacuating Gaza on the evening of 5 November. By the time the British broke through at Hareira–Sheria late on the morning of the 7th, the evacuation was complete and the retreating Ottoman forces were marching north, leaving rearguards behind at key positions along the road and in the nearby hills.
Allenby had won a great victory. Gaza had fallen, the Ottoman defensive line had been broken and the Seventh and Eighth Armies had been defeated in battle. But it was not the total victory he had aimed for—he had not trapped and destroyed the two Ottoman armies. Instead, they were escaping to the north, battered but still capable of regrouping to fight another day.
Sources: Roads to the Great War; New Zealand History
On to Jerusalem
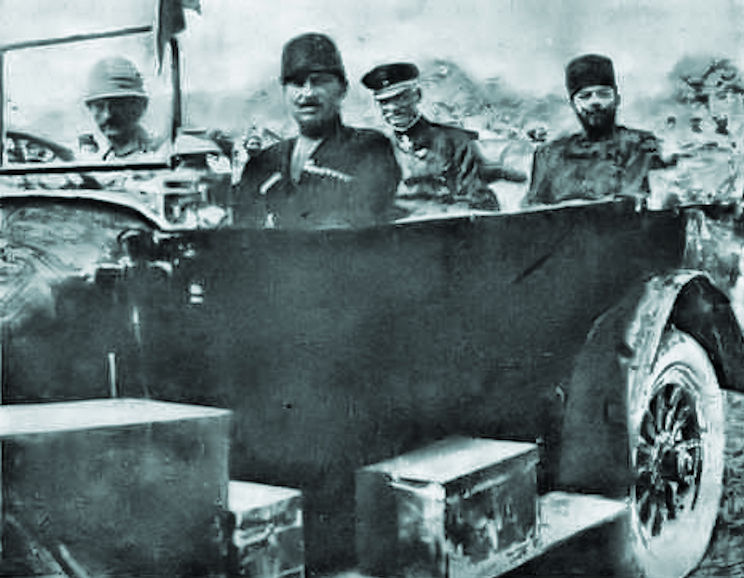
German General Erich von Falkenhayn and Jemal Pasha Visiting Jerusalem
The Third Battle of Gaza exhibited Allenby's talent for
orchestrating a combined arms operation while
concurrently managing the problems of transport,
supply, and deception. The battle had not been without
lessons. Chauvel's DMC suffered a number of casualties
from German aircraft, revealing the vulnerability of
exposed troops in a desert environment. The rough
terrain east of Gaza proved difficult for both the
mounted units and their supporting logistical assets. Nonetheless,
Allenby gave little pause and pursued the Turks
northward as they retreated toward Junction Station, where a critical action would be fought on 13-14 November.
Junction Station
Allenby's forces first defeated a Turkish attempt to defend the line of the railway to Jerusalem. The center of that line was Junction Station, where the line from Jerusalem joined the main north-south line. East of Junction Station, the Turkish line ran almost alongside the railway but ran through hilly country unsuitable for the British cavalry. West of Junction Station, the line ran west to the villages of El Mughar and Katrah, on either side of the Wadi Jamus, and then turned north.
General Allenby next decided to turn the Turkish right (western) flank. XXI Corps would attack south of Katrah, along the line of the main road from Gaza to Junction Station. On their left, the Yeomanry and Anzac Cavalry Divisions would attack to their left, from El Mughar to the north.
The advance began at 0700. on 13 November. After pushing back Turkish outposts, the advance became stuck at around 1000. Both the 52nd Division, attacking Katrah and El Mughar, and the cavalry farther north, came to a halt in front of strongly located defenses. The key to the British victory was a dramatic cavalry charge at El Mughar. At 1430 it was decided to use the 6th Mounted Brigade to attack the Turkish lines on the ridge north of the village. Despite having to advance across 3000 yards of open terrain, the cavalry successfully reached the ridge at El Mughar, and their dismounted reserve captured the village itself.
To their right, Katrah was eventually captured by the 52nd Division. The next day, 14 November, the 75th Division captured Junction Station, cutting the Turkish rail link to Jerusalem.

City Officials Surrendering Jerusalem to Allenby's Forces
The Turkish armies were now split in two. The Eighth Army, under Kress von Kressenstein, was on the coast, protecting the railway north, while the Seventh Army was isolated at Jerusalem. All supplies had to come over poor roads from Nablus, 40 miles to the north, or from Amman, on the Hejaz Railway, 50 miles to the east. However, their position around Jerusalem was a strong one, protected by the difficult ground of the Judean Mountains.
Taking Jerusalem
Allenby finally had the opportunity he had so long craved. Jerusalem lay within his grasp. Still, he faced a dilemma. The short, sharp battles for Gaza and Beersheba had left those towns in ruins. Jerusalem boasted much stouter defenses and meant enough to the Ottomans that a protracted fight was likely. Allenby wanted to liberate Jerusalem, not preside over a battle that might reduce it to rubble. Allenby's plan was to avoid fighting in or near Jerusalem, cutting all road access to the city, and forcing the Ottoman forces to abandon it.
With the Turkish Seventh and Eighth Armies isolated
from one another, Allenby next set his sights on
Jerusalem, which Lloyd George had ordered taken by
Christmas. Moving as rapidly as supply lines would
allow, the EEF made good progress against a stiffening
Turkish defense. Counterattacks increased in number
and intensity. As one commentator noted, "The Turkish
troops fought with a remarkable gallantry and
succeeded at some points in gaining a footing in the
outer line of the British defenses."
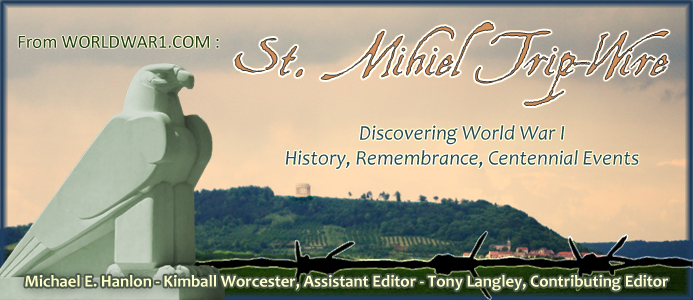
By 8 December, though, with British forces occupying the heights west of Jerusalem, the Ottoman lines began to crack, and their commander decided to abandon the city. On the next day, they withdrew northward. British forces quickly learned the Ottoman army had retreated toward Nablus and Jericho and that the Holy City stood undefended, waiting for the British entrance. The local officials were waiting, they signaled they did not want British forces to enter Jerusalem as Germany's Kaiser Wilhelm II had done during a state visit in 1898—his grandiose entry through ceremonial arches on an enormous white horse struck contemporaries as arrogant and posturing.
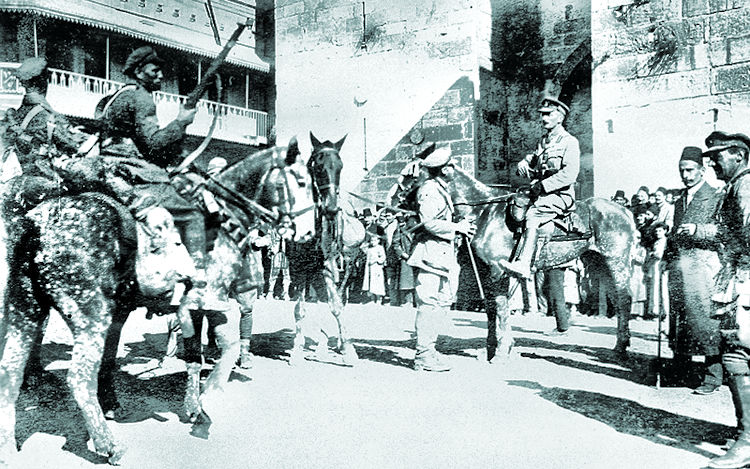
British Forces Entering the City
Allenby's own entry was decidedly more modest and measured. On December 11 he strolled through the Jaffa Gate with as little fanfare as possible given the circumstances. The British flew no flags for the occasion, and they dispatched Muslim soldiers from Punjab to guard the al'Aksa Mosque and the Dome of the Rock. Allenby read a proclamation of goodwill written for him in London and had it published in seven languages throughout the city. It pledged the British would not interfere with Jerusalem's commerce or governance and promised respect for and protection of the city's many holy sites. Von Kressenstein later wrote:
"From a purely military point of view, the loss of
Jerusalem was of no importance, but the moral effect of
its capture, after having been in Turkish hands for 700
years . . . was a severe blow to the prestige of the Caliphate and of Turkey."
Allenby's 1917 campaign had achieved significant
operational and strategic objectives. He had broken
through the Gaza defenses and into the southern
frontiers of Palestine, giving little respite to the
retreating and shaken Turks. His capture of Jerusalem
gave the Allies a much-needed morale boost in an
otherwise sagging war effort. With 1917 coming to a close,
Allenby was planning for the complete
annihilation of the Turkish forces in Palestine in 1918.
Asked again after the fall of Jerusalem, Allenby wrote that he could complete the conquest of Palestine with his existing forces, but would need 16 to 18 divisions, on top of the 8 to 10 he already had, for a farther advance of 250 miles to the Damascus-Beirut Line and then to Aleppo to cut Turkish communications to Mesopotamia. General Jan
Smuts was sent to Egypt to confer with Allenby and Marshall (C-in-C Mesopotamia). Allenby worked with Smuts to draw up plans to reach Haifa by June and Damascus by the autumn, reinforced by three divisions from Mesopotamia. The speed of the advance was limited by the need to lay fresh rail track. This met with War Cabinet approval (6 March 1918). The German spring offensive on the Western Front meant that Allenby was without reinforcements after his forces failed to capture Amman in March and April 1918. He halted the offensive in the spring of 1918 and had to send 60,000 men to the Western Front, although the Dominion Prime Ministers in the Imperial War Cabinet continued to demand a strong commitment to the Middle East in case Germany could not be beaten. New troops from the British Empire (specifically Australia, New Zealand, India, and South Africa) led to the resumption of operations in August 1918. Allenby's renewed offensive will be the main topic of next month's St. Mihiel Trip-Wire.
Sources: HistoryNet; History of War; Over the Top, June 2010; Mental Floss: HistoryHit; Wikipedia
100 Years Ago:
|

Conference Session of
|
The formal opening of the Washington Naval Conference occurred on Armistice Day 1921. The major naval powers of Britain, France, Italy, Japan, and the United States were in attendance as well as other nations with concerns about territories in the Pacific—Belgium, the Netherlands, Portugal, and China—who were not parties to the disarmament discussions. Soviet Russia was not invited, nor were the defeated Central Powers. The American delegation was led by Charles Evans Hughes, the secretary of state, and included Elihu Root, Henry Cabot Lodge, and Oscar Underwood, the Democratic minority leader in the Senate.
In the initial session, Hughes shocked the delegates by going beyond platitudes and offering a detailed plan for arms reduction. Labeled by some as one of the most dramatic moments in American diplomatic history, Hughes called for the scrapping of nearly two million tons of warships and a lengthy “holiday” on the construction of new ships. He was widely hailed in the press as a savior, but leaders of the other Allied governments were quietly skeptical. Over the following weeks, a series of agreements was concluded, the most famous of which involved limitations on fleet sizes, the use of submarines in future wars, and the outlawing of poison gas.
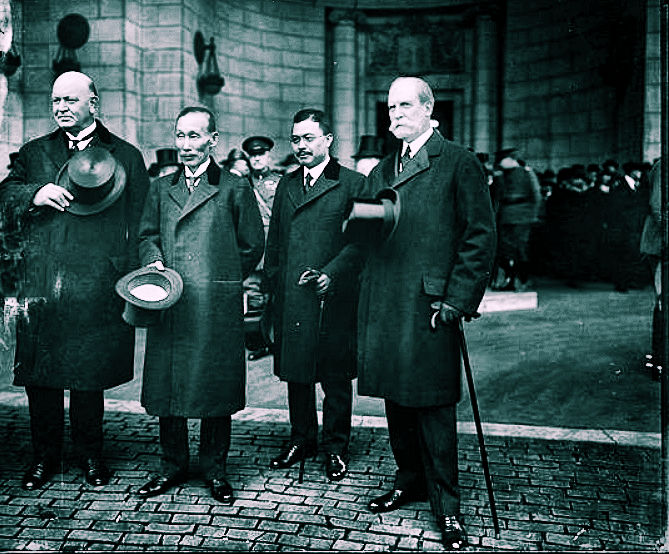
Secretary of State Hughes Greets Japan's Delegates
Five-Power Naval Limitation Treaty. This agreement implemented the sweeping proposals of Hughes in somewhat modified terms. The leading naval powers—Britain, France, Italy, Japan, and the United States—pledged adherence to limitations on the tonnage of capital ships and accepted a moratorium on new naval construction.
Five-Power Supplemental Treaty. The major Allied naval powers agreed on a series of rules for the use of submarines in future warfare and also outlawed the use of poisonous gases as a military weapon.
In the following months, the U.S. Senate ratified all of the treaties from the Washington Conference. However, a reservation was attached to the Four-Power Pact stating that no agreement had been approved that required the “commitment of armed force” by the United States.
Source: U-S-History.com
Progress Report On A Soldier's Journey
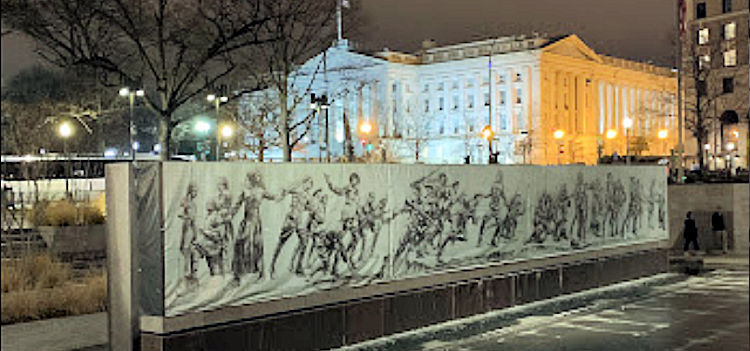
National World War I Memorial, December 2021
As you can see from the photo above, even though the National World War I Memorial is fully open, its centerpiece, Sabin Howard's epic bronze sculpture, A Soldier's Journey, is not in place yet. The temporary substitute is a matching cartoon of the completed work. The final version will be installed in four sections from left to right. Hopes are to complete the installation by late 2023 or early 2024. The complicated multi-step design process starts with armatures of each of the 38 figures created using 3-D printing by a firm in England. When they are returned to the U.S., Sabin sculpts the finished figures in clay. The clay figures are then cast in bronze back in England at a foundry. For the first section (shown in clay below) the process is nearing completion. As soon as the foundry completes its work, section one will be shipped back to Washington and installed at the site. When that is to take place, we will, of course, announce the event for all our readers.
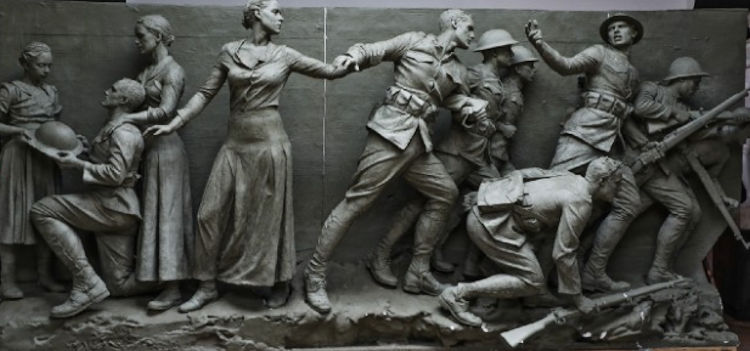
Full-Sized Clay Sculpture of Section 1 Ready for Shipping to the Foundry
Source: Doughboy Foundation
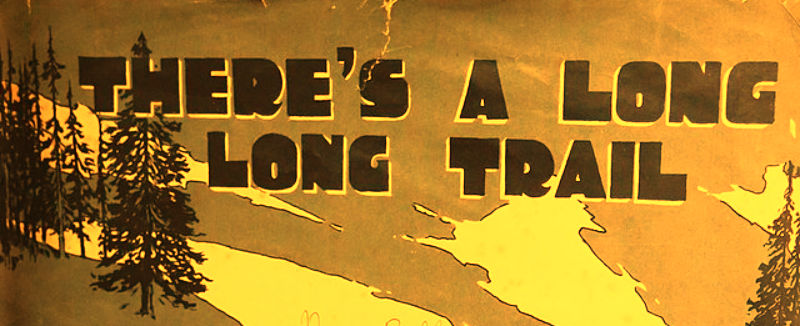
A World War One Music Video
Commentary by James Patton
There’s a long, long trail a-winding
Into the land of my dreams.
Where the nightingales are singing
And the white moon beams.
There’s a long, long night of waiting
Until my dreams all come true;
Till the day when I’ll be going down
That long, long trail with you.
This is the memorable chorus of what was one of thfe most iconic songs of the WWI era. Like the contemporaneous piece It’s a Long Way to Tipperary, this ballad seemed to capture the mood of the public in WWI in Britain and later on in the U.S. as well. Tear-jerking in its sentimentality yet somehow not maudlin, it tells of happier times, special places, and eventual reunions. People enduring the horrors of the war, whether at the Front or at home, drew comfort and strength from the message. It helped that the tune is very sing-able, too.
Like Tipperary, Long, Long Trail has nothing to do with the war or anything military. Also like Tipperary, it was written before the war. Although it enjoyed great popularity in Britain, it was written by two Americans who were at the time seniors at Yale, Stoddard King (1889-1933) and Alonzo "Zo" Elliott (1891-1964). Many millions of copies of the sheet music were sold, but neither King nor Elliott pursued future success as songwriters. King branched out to poetry, publishing six volumes, and wrote a daily column for the newspaper in Spokane, Washington up to his untimely death at age 43.
Zo Elliot became a lawyer and dabbled in music as a hobby. In 1943 he composed the march British Eighth in honor of that unit’s victory over Rommel’s Afrika Korps in WWII. The British army has never included this piece in its repertoire, possibly due to its length, but it is a staple among American high school and college bands. Unlike Tipperary, Long, Long Trail can’t be a march, so it never made it into the military songbook. Nevertheless, it endured for decades in the public consciousness; it was performed by Frank Sinatra and Bing Crosby in the 1950s, I saw it performed on the CBS TV show M*A*S*H in the 1970s and the chorus was still in our Boy Scouts camp songbook as late as 1958. The performance of Long Long Trail shown here is from the finale of the 2014 BBC One television series The Crimson Field, a story about a group of nurses and VADs at a casualty clearing station in France.
Sources: Video Courtesy of Stephen Morse; Commentary originally appeared in Kansas WW1, 7 July 2018

| Thanks to each and every one of you who has contributed material for this issue. Until our next issue, your editor, Mike Hanlon. |
|
|
Content © Michael E. Hanlon