Diorama of the Battle of Samakh on the Shore of the Sea of Galilee That Opened the Road to Damascus
(Australian War Memorial
I'm happy this month to conclude our three-part discussion of the Great War in the Sinai and Palestine. For over 30 years I've been attending meetings and conferences of the various World War I organizations and I have never heard a presentation on this aspect of the war. In putting this issue together, I've been able to dredge up from my distant memories what activated my own special interest in this region. On a trip to Israel in 1989, one of our group's days of touring was dedicated to the northern part of the country. It turned out to be a long day that included stops at Nazareth, the Mount of the Beatitudes, a kibbutz, the Sea of Galilee, and more. On the stretch back to Jerusalem, our guide let us rest a bit, and everyone was dozing off. Abruptly, the bus stopped, our guide went on the mic, and announced in a dramatic tone, "Look around ladies and gentlemen. You are in the Valley of Armageddon. According to some scriptures, this is where the last battle between Good and Evil on Earth will be fought." That sure woke everyone up—possibly like me—hopeful that the big battle was not about to start, like, now. Anyway, here's the story of the Great War's Battle of Armageddon. MH
From Cyril Falls' Armageddon
(Right Click Image to Enlarge)
A Note on Sources: Our articles on Allenby's 1918 campaign have quoted extensively from two studies,
"Deep Battle in World War One: The British 1918 Offensive in Palestine," by Lt. Cmdr. Paul A. Povlock of the Naval War College, and "Armageddon�s Lost Lessons: Combined Arms Operations in Allenby�s Palestine Campaign," by Lt. Col. Gregory Daddis of the U.S. Military Academy
After Jerusalem: What Next?
By the Editors
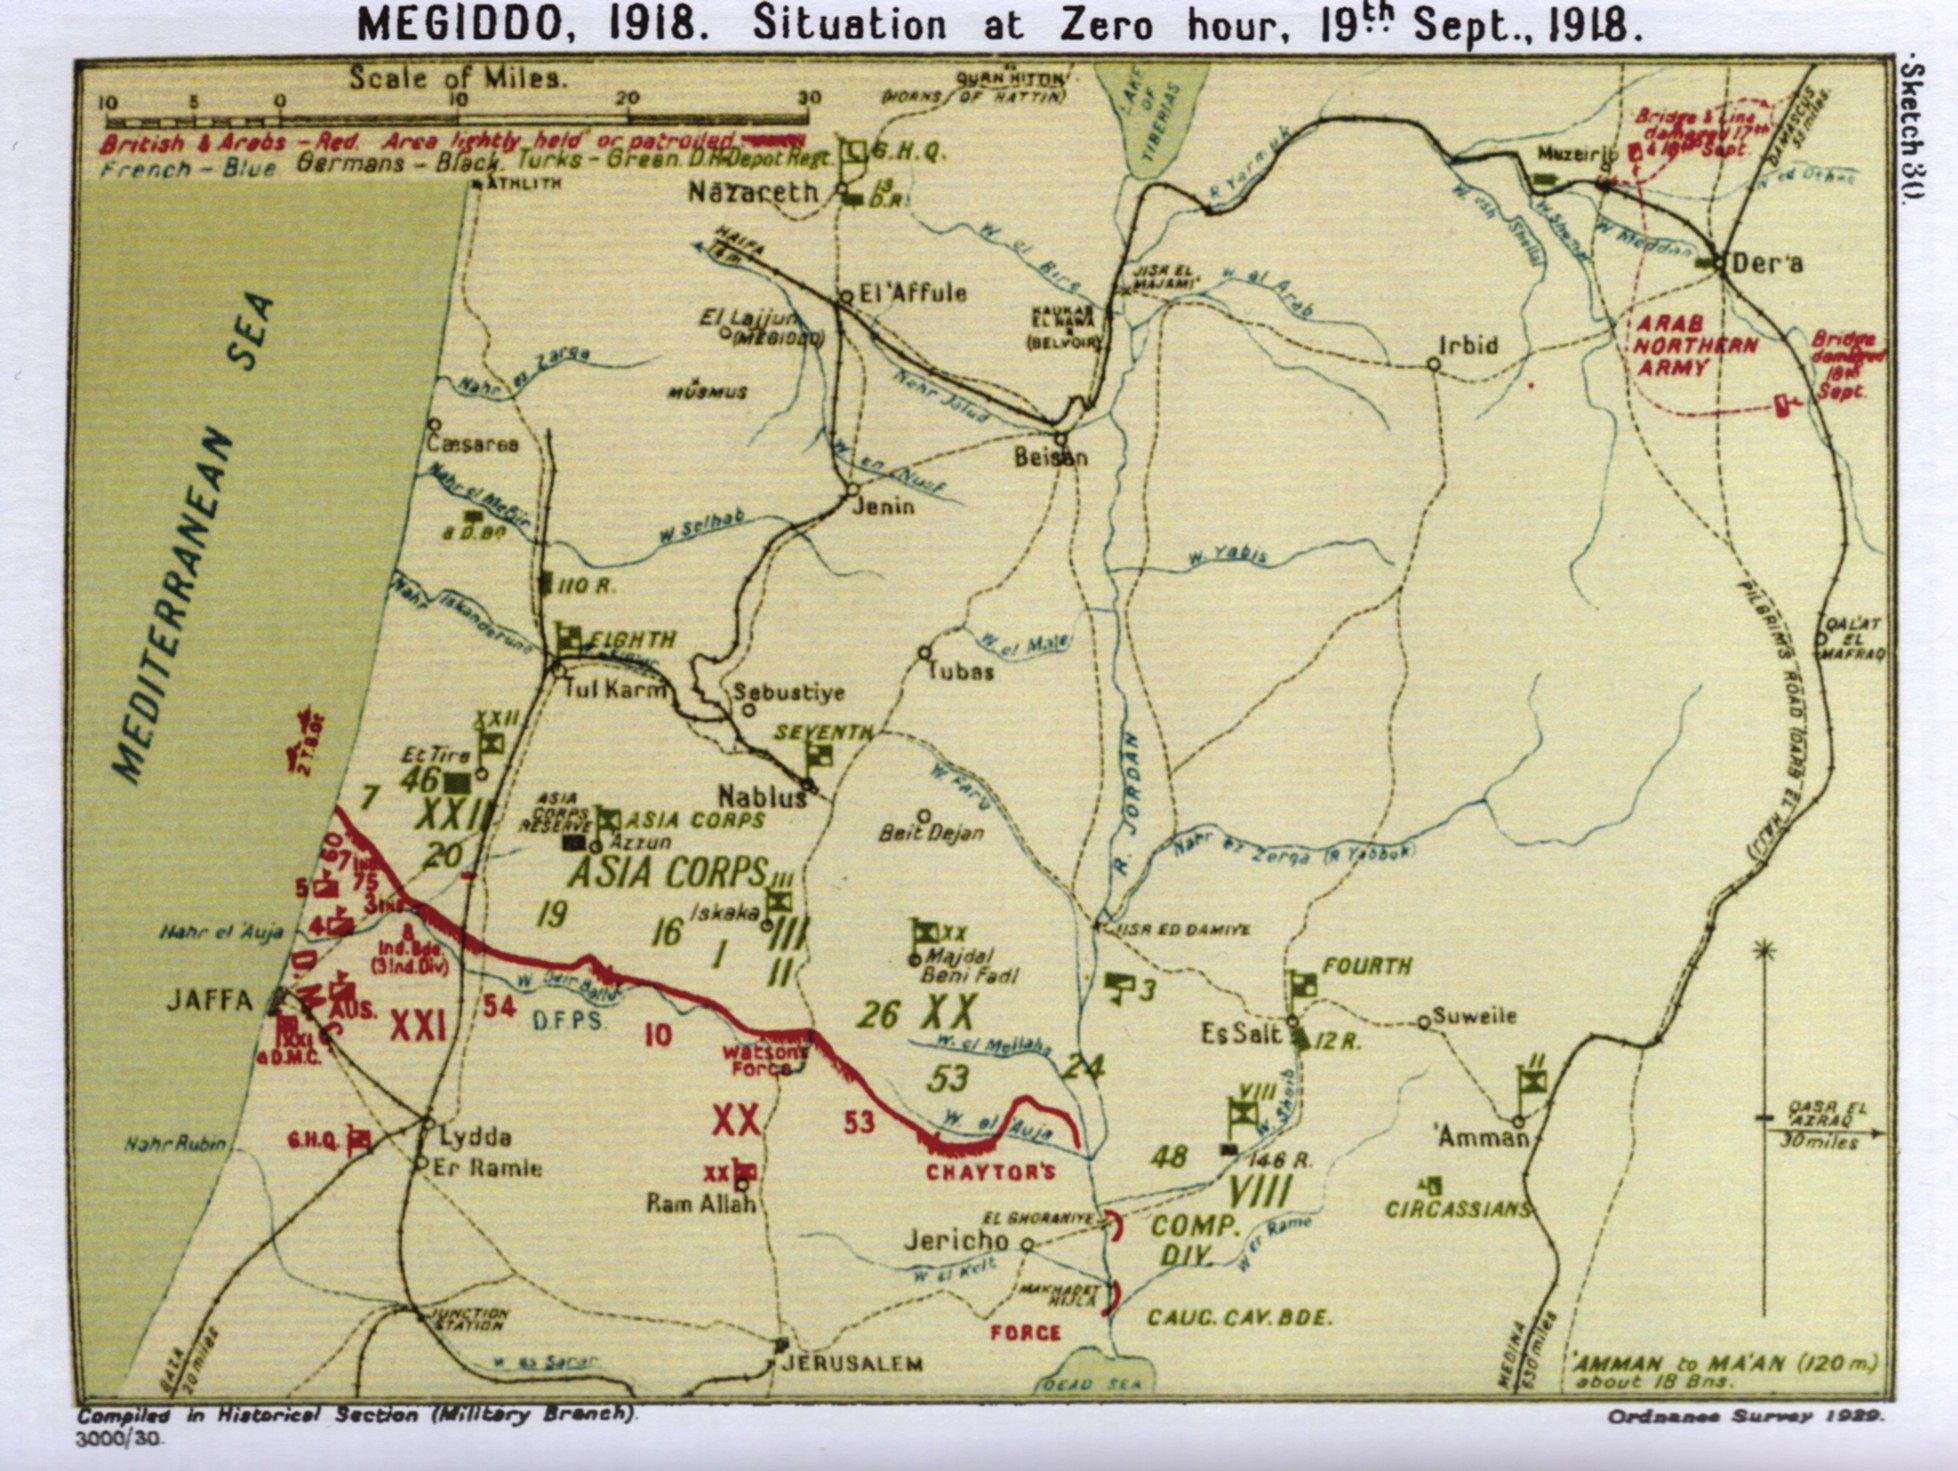
Muslim Soldiers of the British Army Guarding the Dome of the Rock
Allenby's 1917 campaign had achieved significant operational and strategic objectives. He had broken through the Gaza defenses and into the southern frontiers of Palestine, giving little respite to the retreating and shaken Turks. His capture of Jerusalem gave the Allies a much-needed morale boost in an otherwise sagging war effort. With 1917 coming to a close, Allenby would continue to focus on the complete annihilation of the Turkish forces in Palestine. Winter rains had put an end to campaigning for the Egyptian Expeditionary Force (EEF) after the advance from the Gaza-Beersheba line to the capture of Jerusalem in December 1917. This lull in the fighting offered the opportunity for the captured territories to be consolidated. Extensive developments were also required along the lines of communication to ensure that frontline troops were adequately supplied, as they were approximately 150 miles (240 km) from their main bases at Moascar and Kantara on the Suez Canal.
The 1918 Campaign
After the shoring up, Allenby defined his first goal of 1918 on 25 January: "I want to extend my right, to include Jericho and the N[orth] of the Dead Sea." This advance would remove the more serious threat to his right by pushing all the enemy across the Jordan River and securing the Jordan River crossings. It would also prevent raids into the country to the west of the Dead Sea and provide a narrow starting point for operations against the Hedjaz Railway.
Allenby's Allied troops began the renewed offensive on Tuesday, 19 February, on the outskirts of Jerusalem. Despite battling adverse weather conditions and a determined enemy in the Turks, the Allies were able to move nearly 20 miles toward Jericho in just three days. On the morning of 21 February 1918, combined Allied forces of British troops and Australian mounted cavalry captured the city of Jericho. The time for a decisive push north through Palestine to Syria seemed at hand. However, distant events interceded.
Events on the Western Front would critically impact the organizational structure of the Egyptian Expeditionary Force in the early months of 1918. Hoping to break the deadlock of the trenches before American manpower would again shift the balance of power in favor of the Allies, Gen Erich von Ludendorff launched Operation Michael on 21 March. A massive drive of over 60 divisions, Michael made initial progress but was held up at Arras, thanks to a determined British defense. But the Allied High Command was alarmed.
As Ludendorff continued to follow up his initial drive, the British War Office hurriedly pulled divisions from other theaters to fill losses in France. Allenby was forced to send the bulk of his soldiers to the Western Front, retaining only one British division. Partially trained Indian regiments constituted the majority of the EEF's replacements, and while the cavalry arm was no worse for the wear, the infantry and specialty troops were seriously weakened. For instance, signalmen, normally requiring two years of training, were forced to become proficient in just two months.
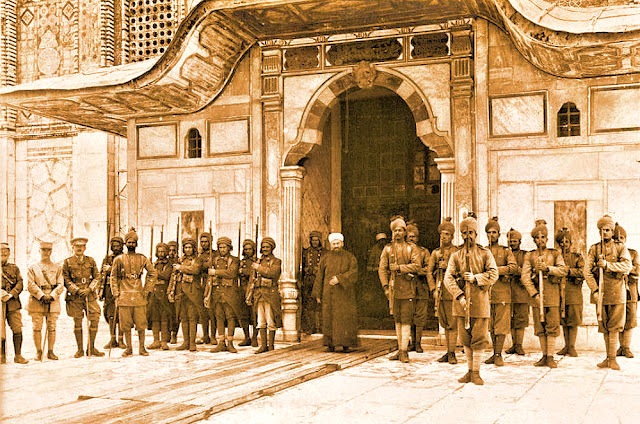
Turkish Soldiers Killed Attempting to Retake Jerusalem
Before losing his veteran troops, the EEF commander ordered expeditions across the Jordan River toward Amman in March. Hoping to combine efforts with Lawrence's Arabs and capture important Turkish garrisons in the Es Salt region, Allenby believed the raids would demonstrate Ottoman vulnerabilities in the East. Unfortunately, poor weather grounded aircraft, Arab cooperation never materialized, and the Turks intrepidly fought off the attack. The EEF suffered its first setbacks in nearly a year. Chetwode later wrote, "These two expeditions of Allenby's across the Jordan were the stupidest things he ever did, I always thought, and very risky." While tactically a reverse, Allenby had accomplished one key operational objective. The Trans-Jordan raids had raised doubt in the enemy camp as to where the next major blow would fall�either east of the Jordan River or west, on the coastal flank.
Throughout the spring and summer of 1918, Allenby took advantage of the forced operational pause to bring his new troops up to training standards. One soldier in the Egyptian Camel Transport Corps described Allenby's guidelines: "The principle adopted in the infantry was to brigade one British battalion to every three Indian battalions right through the divisions; and this acted very well indeed, for the White troops provided just that leaven of steadiness lacking in the young Indians." During the same time, supply matters were tended to as the EEF's railway was extended to the front lines. Royal Air Force (RAF) pilots�the RAF being officially formed on 1 April 1918�flew photography missions while also dropping propaganda leaflets among the already demoralized Turkish troops. As desertion rates swelled among the ranks, Mustafa Kemal, commander of the Seventh Army, lamented that British aircraft were "dropping more leaflets than bombs."
Turkish Prisoners Captured, July 1918
By the autumn of 1918, Allenby decided that the time was ripe to capitalize on the deterioration of the enemy army. His plan, code-named Armageddon, aimed at the complete destruction of the Yildirim Army Group by exploiting Turkish preconceptions created in part by the Trans-Jordan raids. The Amman expeditions, coupled with the assault at Beersheba a year earlier, had shown the vulnerability of the eastern flank. Using an elaborate deception plan that reinforced Turkish predilections, Allenby decided to reverse the formula used at the Third Battle of Gaza by placing the weight of his effort on the coastal flank
Organizing Armageddon
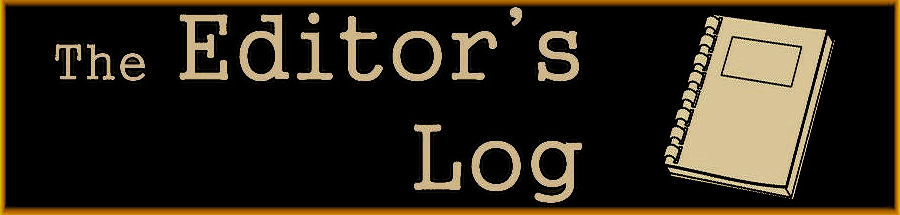
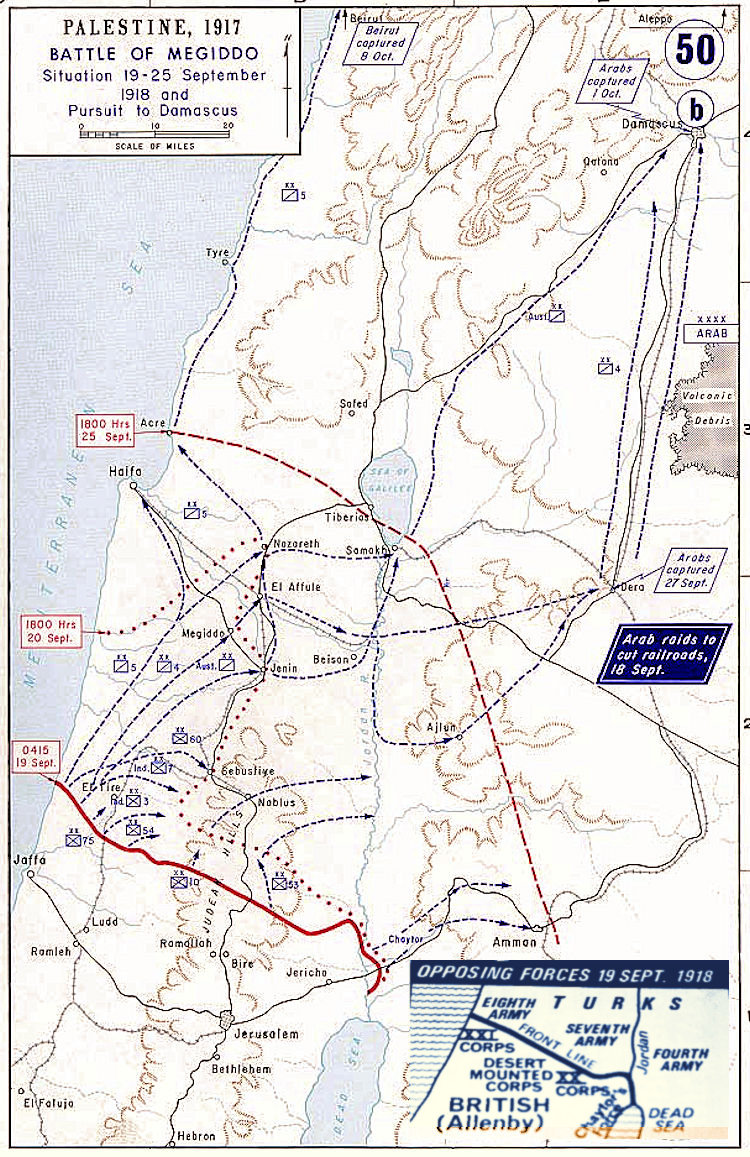
In September 1918 the British front extended from the Mediterranean Sea just South of Caesaria across the Judean hills to the Jordan River Valley slightly north of Jericho. The Jordan valley was steep and desolate with few serviceable roads. The Judean hillside was equally poorly suited for mobile operations. The major towns in this area had easily defended approaches. Only the narrow coastal region offered the terrain necessary for a rapid breakout. It offered few obstacles to movement, though the narrowness of the region could allow the Turks to concentrate there. The open terrain widened to the north with few obstacles to maneuver to the major Turkish command and communications centers at El Affula, Nazareth, and Samakh on the south end of the Sea of Galilee.
The EEF consisted of three corps comprising approximately eleven division equivalents of troops. Its XXI Corps contained four infantry divisions, including the two Indian divisions that had just arrived in theater, and a small French contingent. The XX Corps possessed two Infantry divisions. The British Desert Mounted Corps (DMC) was the mobile striking force. It consisted of the Australian Mounted Division and the Indian Cavalry divisions that had arrived from France.
Each of the Cavalry divisions contained armored car detachments, while the Australians were trained to fight as either mounted infantry or shock cavalry troops. Chaytor's Force, named after its commanding general, filled out the British ranks. This force consisted of the ANZAC Mounted Division and an Indian Infantry Brigade, plus supporting artillery units. At the sharp end of the stick, Allenby had 12,000 cavalrymen, 57,000 riflemen, and 540 guns, plus the normal combat support troops.
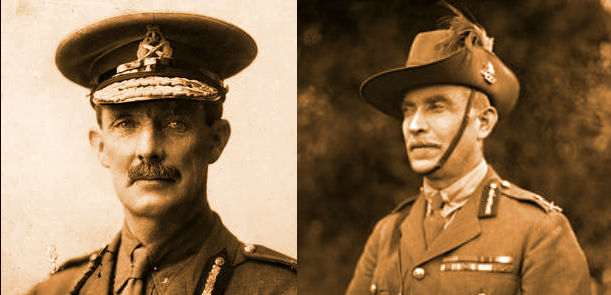
New Zealand General Edward Chaytor and Australian General Harry Chauvel Would Be Key Commanders in the Offensive
Supporting the main force were the Arab forces operating on the flanks and fringes of the EEF in Palestine. Numbering only a few thousand on a good day, possessing meager training and few heavy weapons and with a distinct abhorrence for suffering casualties, they proved to be a positive force multiplier in Allenby's
scheme of operations. The Arabs continuously forced the Turks to devote much of their slender resources to keep the railroads open.
The forces opposing Allenby were organized under the Yildirim Army Group commanded by Liman von Sanders. South of the Haifa-Dera railway, this included three armies with 23,000 infantry and 2,000 cavalry. North of the line, in reserve, were 32,000 infantry and 3,000 cavalry.
Allenby's plan for the offensive was both daring and creative, in stark contrast to the unimaginative attacks that characterized much of British operations on the Western Front. Noting the single railroad supplying the Turkish armies, Allenby correctly assessed that the seizure of El Affula and Samakh would sever Turkish lines of communications. Threatened with encirclement, the Turkish Eighth and Seventh Armies would be reduced to a single line of retreat through the Jordan Valley, a region already noted for its paucity of roads. Under attack from all his forces, Allenby believed that the Turkish forces would not be able to handle the strain and could be destroyed. Events would prove his assessment correct.
Visit Our Daily Blog
Click on Image to Visit
British Infantry,
Palestine, 1918
Different Perspectives
Various looks at the Middle East after the Armistice.
The final Palestinian and Syrian campaign of World War I is of absorbing interest for several reasons, but most of all because it includes one of the most brilliant cavalry operations in the history of warfare�and the last of its kind. In my view, the achievement of the Red cavalryman Budenny in the war against the Whites cannot be ranked with that of Allenby's British cavalry in 1918. . . Few precedents are to be found for the extent of this annihilation [of an enemy force].
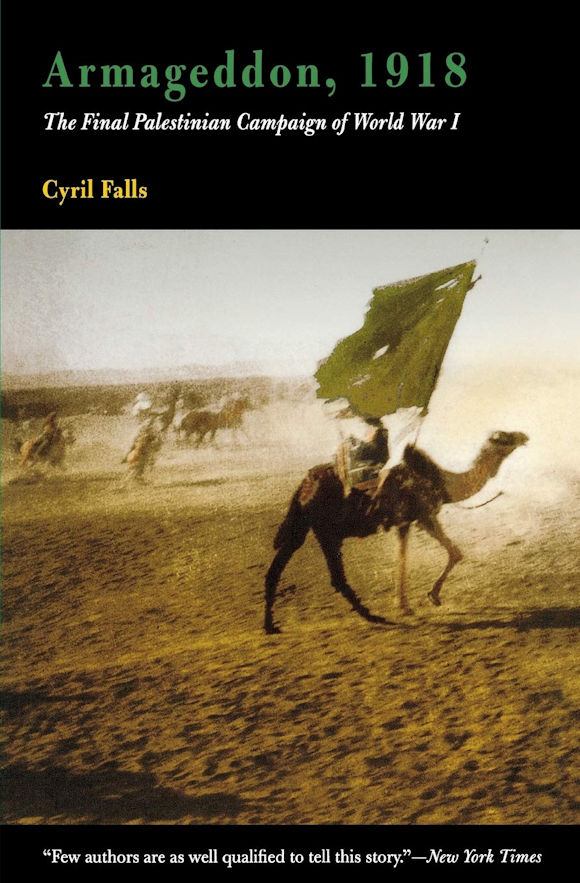
Armageddon, 1918
Cyril Falls, Armageddon, 1918
Support Worldwar1.com's
Free Publications
Shop at
Amazon.com
Megiddo and Armageddon
Ruins of Ancient Mediggo
There's reason why the Book of Revelation places the final battle between Good and Evil there, suggests Professor Eric Cline of George Washington University.
The Apocalypse. Judgment Day. The End of Times. Armageddon.
Students of the Bible know it as the place where the cataclysmic battle between the forces of good and the forces of evil will unfold. Many believe that this battle will take place in the very near future, but few know that Armageddon is a real place�one that has seen more fighting and bloodshed than any other spot on earth.
Armageddon is a corruption of the Hebrew Har Megiddo and means literally "the mount of Megiddo." During the past 4000 years, at least 34 bloody conflicts have already been fought at the ancient site of Megiddo and adjacent areas of the Jezreel Valley. Egyptians, Canaanites, Israelites, Midianites, Amalekites, Philistines, Hasmonaeans, Greeks, Romans, Muslims, Crusaders, Mamlukes, Mongols, French, Ottomans, British, Australians, Germans, Arabs, and Israelis have all fought and died here. The names of the warring generals and leaders reverberate throughout history: Thutmose III, Deborah and Barak, Sisera, Gideon, Saul and Jonathan, Shishak, Jehu, Joram, Jezebel, Josiah, Antiochus, Ptolemy, Vespasian, Saladin, Napoleon, and Allenby, to name but a few of the most famous.
Throughout history, Megiddo and the Jezreel Valley have been Ground Zero for battles that determined the very course of civilization. It is no wonder that the author of Revelation believed Armageddon, the penultimate battle between good and evil, would also take place in this region!
Megiddo, a fascinating site of twenty cities built directly on top of one another and inhabited continuously from 3000 to 300 BC, lies at a strategic junction of roads running north-south and east-west. Whoever had control of Megiddo had control of one of the major trade routes of antiquity, the Via Maris (the "Way of the Sea") Wending its way directly through Israel, right past Megiddo in the Jezreel Valley, this strategically placed road ran between Egypt in the south and Mesopotamia (modern Iran/Iraq) or Anatolia (modern Turkey) in the north. Virtually every invading army that came through this region during the past 4000 years fought battles for control of Megiddo and the Jezreel Valley. The only exception was the army of Alexander the Great, who didn't have to fight because the area surrendered to him first.
One lesson that can be learned from the history surrounding the area is the importance of maintaining a strategic presence on military and/or mercantile routes. We also see that, while weapons and technology have changed over the millennia, the strategies and tactics frequently have not. Often the strategies used in the battles fought at such places are repeated by different commanders and different armies in different eras. Finally, we learn that, probably as a result of the necessity of occupying such strategic positions, certain areas of the world have seen consistent fighting for literally millennia.
There were so many battles in this little valley, which measures only 20 miles long by seven miles wide, that one might paraphrase Sir Winston Churchill and say "never in the field of human conflict have so many fought so often over so little space!"
Source: "The Battles of Armageddon," Neil Dearberg The Bible and Interpretation, December 2001
Allenby on the death of Lawrence of Arabia
I have lost a good friend and a valued comrade. Lawrence was under my command, but, after acquainting him with my strategical plan, I gave him a free hand. His co-operation was marked by the utmost loyalty, and I never had anything but praise for his work which, indeed, was invaluable throughout the campaign.
He was the mainspring of the Arab movement. He knew their language, their manners, their mentality; he understood and shared their merry, sly humor; in daring, he led them; in endurance, he equaled, if not surpassed, their strongest.
Though in complete sympathy with his companions, and sharing to the full with them their hardship and danger, he was careful to maintain the dignity of his position as Confidential Advisor to the Emir Feisal. Himself an Emir, he wore the robes of that rank and kept up a suitable degree of state.
His own bodyguard–men of wild and adventurous spirit–were all picked by Lawrence personally. Mounted on thoroughbred camels, they followed him in all his daring rides; and among those reckless desert rangers, there was none who would not willingly have died for their chief. In fact, not a few lost their lives through devotion to him and in defence of his person.
The shy and retiring scholar, archaeologist, philosopher, was swept by the tide of war into a position undreamt of. His well-balanced brain and disciplined imagination facilitated adaptation to the new environment; and there shone forth a brilliant tactician, with a genius for leadership.
Such men win friends–such also find critics and detractors. But the highest reward for success is the inward knowledge that it has been rightly won. Praise or blame was regarded with indifference by Lawrence. He did his duty as he saw it before him.
He has left, to us who knew and admired him, a beloved memory; and to all his countrymen, the example of a life well-spent in service.
Source: BBC Radio Interview, 22 May 1935 (Allenby would die in May 1936.)
Megiddo
From the U.S. Military Academy Collection
(Right Click Image to Enlarge)
The keys to success in the coming battle would be speed, mass, and surprise. The
DMC was placed right behind XXI Corps, thanks in
large part to lessons learned on the Western Front. As
Chauvel's biographer noted, "Operations in France had
shown how important it was to position cavalry well
forward to move through a gap as soon as it was
cleared." Insistent on speed and mobility, Allenby
directed that the cavalry not get bogged down in local
actions but instead stay massed for a decisive blow
against the enemy's main body. Paralyzing the Turkish
forces would assist the DMC in achieving its objectives.
The EEF's deception plan was consequently an elaborate
design, including dummy horses and empty tents lining
the Jordan Valley. On the eve of battle�set to launch on
19 September�Allenby was confident that he had
confounded von Sanders. "That the enemy expected an
offensive on my part about this date is probable. That he
remained in ignorance of my intention to attack in the
coastal [sector] with overwhelming numbers is certain."
Integral to the entire campaign plan would be the RAF's
accomplishments. With one squadron attached to each
corps, Allenby depended on his air assets to
accomplish a number of diverse missions�strategic and
tactical reconnaissance, artillery cooperation, protection
from hostile aircraft, and aerial bombing. Prior to the attack's start,
400 square miles of country were photographed and
mapped, while fighters ran security missions to allow
for the secret concentration of forces building up on the
coastal plains. Thus, not only had Allenby planned for
an operation in-depth, he had also fully integrated the
air piece to ensure the battle was truly three-dimensional. Correctly assessing that the Turkish
centers of gravity lay in their rail transport and command and communications sites,
the EEF commander was about to exploit the full
spectrum of combat multipliers against a demoralized
enemy. As Allenby's biographer, Archibald Wavell, contended, the battle had
"been practically won before a shot was fired."
The first shots of the Megiddo battle would not be fired
by Allenby's ground forces but instead by the Arab
Northern Army operating on the eastern flank. Supported by a flight of British airplanes and an armored car
squad, the Arabs attacked railway lines and station
buildings at Dera beginning on 16 September. RAF
bombing runs affected Turkish morale as much as
railway traffic, while Arab raids, led by the energetic
Col T. E. Lawrence, created havoc along enemy
communication lines. Lawrence would later note that
the "Turks' hopeless lack of initiative made their army a
"directed" one so that by destroying the telegraphs, we
went far towards turning them into a leaderless mob."
Von Sanders reacted as expected, sending
reinforcements from the coastal city of Haifa east
toward Dera. Then, with the enemy command center
distracted and soon to be completely cut off from the
front lines, Allenby unleashed his modern-day version
of Armageddon.
Retreating Turkish Column Utterly Destroyed in the Advance
At 0430 on 19 September, 435 artillery guns and
trench mortars�approximately one gun every 50 yards�
opened up a 15-minute bombardment on Turkish
positions along the coastal flank. Along this critical 15-
mile sector, the EEF had massed 35,000 infantry and
9,000 cavalry troops against 8,000 Yilderim infantrymen.
The night before, XX Corps launched its diversionary
attack toward the Jordan River Valley, while just after
midnight a Handley-Page bomber dropped 1,200
pounds of bombs on the El Affula aerodrome, railway
station, and telephone exchange. Von Sanders later
noted that all "telephonic and telegraphic
communication between the Army Group and the
armies was completely broken from the beginning of the
attack." As Bulfin's infantry swept forward 15 minutes
after the start of the artillery barrage, the Turkish
command was unaware of the main attack's weight and
scope.
With the main line quickly broken by the combined
shock of artillery and machine gun fire, the Desert
Mounted Corps rushed through the breach. One
squadron commander from the 19th Lancers described
the elation at the cavalry's exploitation. "As we cleared
the Turkish trenches and rode unopposed through the
debris of defeat, we all felt that the 'G' in 'GAP' for
which we had waited patiently [in France] for years had
at last been reached." By midday, the Turkish Eighth
Army was in shambles, and Chauvel's DMC had
captured Tul Karm.
All this was unknown to von
Sanders, for the RAF had paralyzed Turkish nerve
centers through a well-executed bombing plan. By 20
September cavalry forces supported by armored cars
had cleared Megiddo, 44 miles from the jump-off line, as XX and XXI Corps kept
constant pressure on the retreating Turkish armies. By
nightfall on the 20th, the escape routes at El Affula,
Beisan, and Dera, across the Jordan were shut down by Allenby's ground
forces and the Arab Northern Army.
On the morning of the third day, an Australian Bristol bomber found the Turkish Seventh Army attempting to retreat
northward through the Wadi Fara near Nablus. A steep
gorge, the wadi formed a natural canal in which
thousands of infantry, cavalry, and transport troops
became trapped. Knocking out front and rear vehicles
and thus sealing the gorge, Bristols and DH-9s and
SE-5a aircraft began strafing and bombing runs that
lasted throughout the day. The account of one
Australian squadron described the scene of destruction.
"The long, winding, hopeless column of traffic was so
broken and wrecked, so utterly unable to escape from
the barriers of hill and precipice, that the bombing
machines gave up all attempt to estimate the losses
under the attack and were sickened at the slaughter."
By the end of 21 September, the Turkish Seventh Army
ceased to exist as a capable fighting force. Within 36 hours of the start of the offensive, the major British objectives had been attained. The Turkish Eighth and Seventh Armies were threatened with envelopment and destruction by strong mobile forces to their rear. With few available reserves and his communication net crumbling, von Sanders had little opportunity to influence the battle. He attempted to order his forces to retreat, but only the Fourth Army could even be contacted. It was too late to save all but a corporal's guard of the Seventh and Eighth Armies, as these two formations disintegrated under the strain.
Despite the utter devastation created by his air and
ground forces, Allenby continued to press. Chauvel forwarded orders to the 5th Cavalry Division to seize
Haifa, which it did on 23 September after heavy fighting
in rough terrain during which Indian troops of the 15th Cavalry Brigade distinguished themselves. Two days later Chaytor's force fought
its way into Amman. Meanwhile, the combination of Chaytor's Force and the Arab Army had severely damaged the Fourth Army. In six days Allenby had brought about the complete collapse of the Ottoman forces. He chose the name of Megiddo to signify this victory, as the nearby ancient fortress of Tel Megid appears in the Bible as Armageddon, the location of the final battle between the forces of good and evil.
Chaytor's Force Occupies Es Salt, East of the Jordan River
Victory Exploited
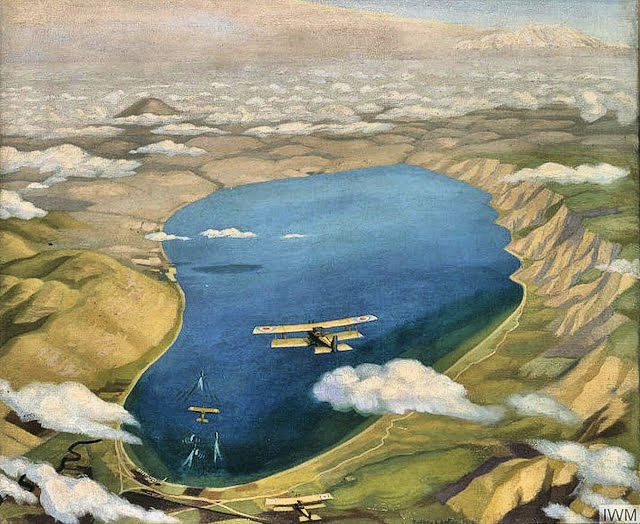
RAF Aircraft at the Sea of Galilee Heading to Damascus
(Sidney W. Carline, 1919)
Despite the defeat of the Seventh and Eighth Turkish Armies, elements of the Ottoman 4th Army were deployed away from the destruction at Sharon and Nablus and still posed a risk. Learning of the losses at those battles, they retreated northward. Allied aircraft again caused heavy losses on the retreating troops.
The continued pursuit northward was aided by Lawrence and the
Arabs who, after capturing Dera, cut the lines of retreat
of the Turkish Fourth Army. Cavalry divisions from the
DMC were thus able to sustain the chase while the
Arabs secured the flanks. Air-ground cooperation
continued during the pursuit Damascus,
with RAF motorcars accompanying lead units of the
DMC. Lorries carrying fuel and stores followed closely
behind, allowing air assets to keep pace with the fast-moving cavalry.
As the last desperate elements of the 4th Army reached Ziza they found their path blocked by the ANZAC Mounted Division. Pursued by Arab irregulars embittered by years of occupation, they surrendered en masse to the Anzacs rather than face slaughter at Arab hands. In the entire battle, the Allies had inflicted losses on the Ottomans of over 25,000 killed, wounded, or captured, effectively ending their ability to continue the war.
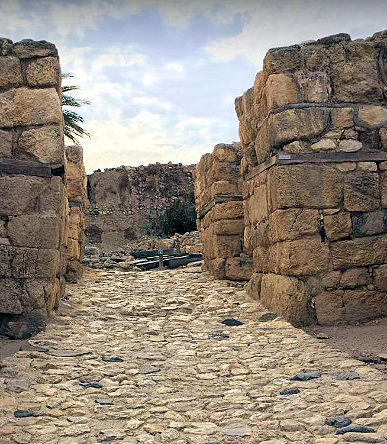
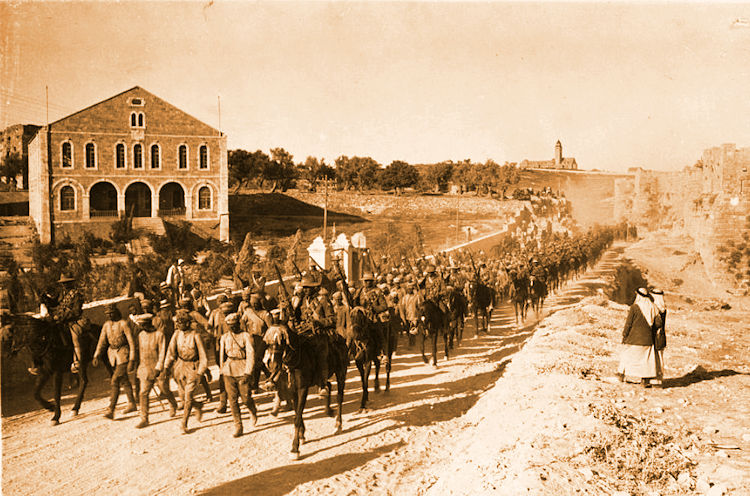
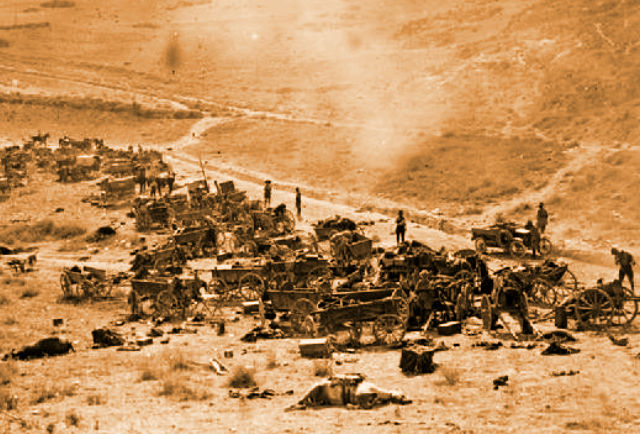
To the west at the south end of the Sea of Galilee, just before dawn on 25 September, mounted troops approached the rail junction of Samarkh. (See illustration at top of the page.) The advance units received heavy fire. Reforming, the 11th Light Horse Regiment attacked the eastern end of the town and two squadrons ofth 12th Light Horse attacked the western end. Samarkh was secured by 05300 with 365 prisoners taken—half of them German. Once the 4th Australian Light Horse Brigade occupied Samakh, the last Turkish stronghold and communications center west of the Jordan was eliminated. For Allenby's forces the way to Damascus, Beirut, and Aleppo now lay open. The remaining Turks were now in headlong retreat, and Chauvel's telegraphic orders on 26 September disclosed that Allenby had revised his battle plans beyond the enemy's annihilation. "Seventh and Eighth Turkish Armies have been destroyed. Fourth Army is retreating on Damascus via Dera. Desert Mounted Corps will move on Damascus."
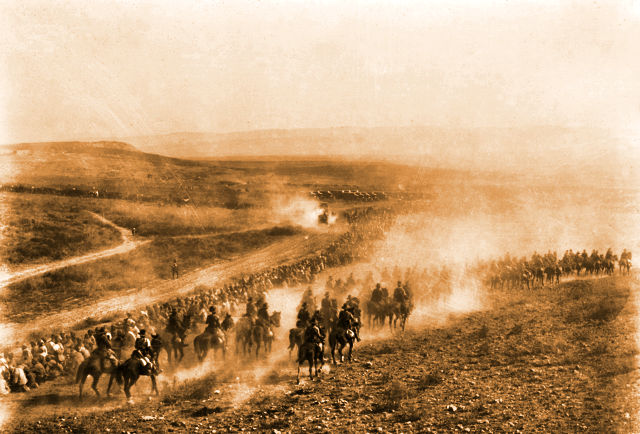
Ottoman stragglers who had escaped the destruction at Megiddo continued to filter north in the hope of regrouping. What followed was one of the most remarkable military pursuits in history. Chauvel led the DMC northward, covering over 100 miles (160 km) in three days and crossing the Golan Heights. This pursuit northward was aided by Lawrence and the Arabs who, after capturing Dera, cut the lines of retreat of the Turkish Fourth Army. Cavalry divisions from the DMC were thus able to sustain the chase while the Arabs secured the flanks. Air-ground cooperation continued during the 100-mile pursuit to Damascus, with RAF motorcars accompanying lead units of the DMC. Lorries carrying fuel and stores followed closely behind, allowing air assets to keep pace with the fast-moving cavalry.
Desert Mounted Corps Crossing the Golan Heights.
One subaltern with the 18th Lancers noted the swath of destruction created by the far-reaching cavalry and aircraft. "We had covered 80 miles in 34 hours. What a sight the roads were! Abandoned lorries and cars, cut off in their attempt to escape, stood every few yards on the road. . . El Affula was a shambles. Engines and trains full of army winter clothing and kits stood in the stations, just as they were surprised that morning."
On the morning of 1 October, the most advanced unit, the 3rd Australian Light Horse Brigade, entered Damascus in pursuit of fleeing Ottoman troops. They accepted the city's formal surrender, much to the annoyance of Lieutenant-Colonel T.E. Lawrence, who had planned a grand ceremony in support of the Arab insurgents' claim to self-rule.
With Damascus occupied in force, Allenby was yet again able to set his sights northward—this time to Aleppo, 200 miles north of Damascus. Meanwhile, the 3rd Indian Division headed to Beirut and the 7th Indian Division towards Baalbek. Homs was also captured on 16 October.
As an illustration of the depth of the EEF's striking power, the
5th Cavalry Division had marched approximately 550
miles in just under 40 days. Though the final pursuit
depleted the strength of the cavalry's men and horses,
by the end of October the final shots of the war in the
Middle East were fired at Haritan, just outside the limits
of Aleppo. Five days later the Turks signed an armistice and the 600-year-old Ottoman Empire was subsequently partitioned.
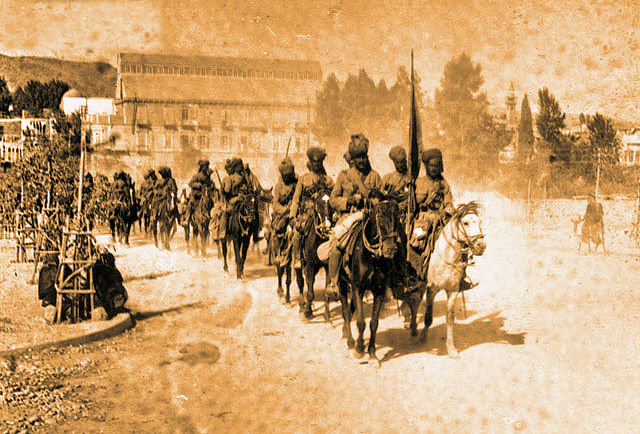
Indian Lancers Entering Damascus
From the opening of the Megiddo battle to the armistice, the EEF captured 75,000 prisoners, 360 artillery pieces, and 800 machine guns. For its efforts, the EEF suffered 5,666 casualties, though of those only 853 were killed in action. As Matthew Hughes contended, the "completeness of the victory at the battle of Megiddo surprised [even] Allenby." In a letter to his wife, Allenby wrote that he was "almost aghast at the extent of the victory." Indeed, it had been one of the most decisive battles fought in World War I, causing the ruination of three Turkish armies and the capitulation of an empire.
Sources: Over the Top, July 2010; The National Army Museum
100 Years Ago:
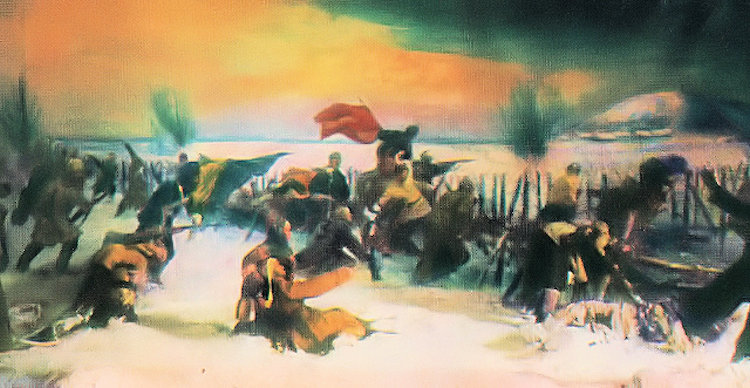
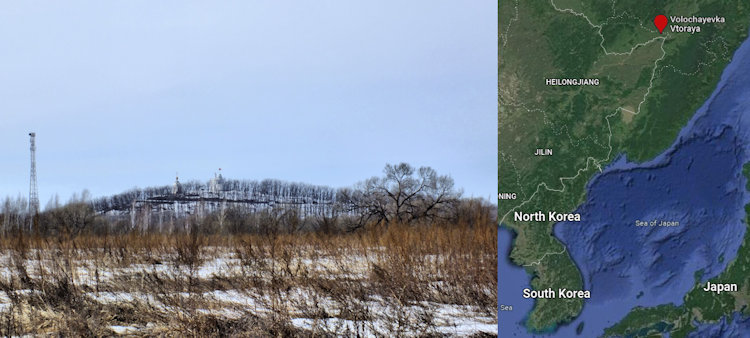
Volochayevka: Last Major Battle of the Russian Civil War
Mural of the Battle at the Local Museum
The battle of Volochayevka, fought near the Amur River, almost 500 miles north of Vladivostok, is one of the most notable battles of the Russian Civil War. It occurred on 5�14 February 1922 near Volochayevka station on the Amur Railway, not far from Khabarovsk. In November 1921 the Far Eastern White Army launched an offensive against the Far Eastern Republic, supported by Japan, which wanted a foothold in the Russian Far East. The White Army, based in Vladivostok, advanced into the north of Primorskaya Oblast, following the railroad and the Ussuri River, occupying cities, towns, and villages, and capturing Khabarovsk.
Ju-Quran Hill, Key Position on the Battlefield & Location of Volochayevka
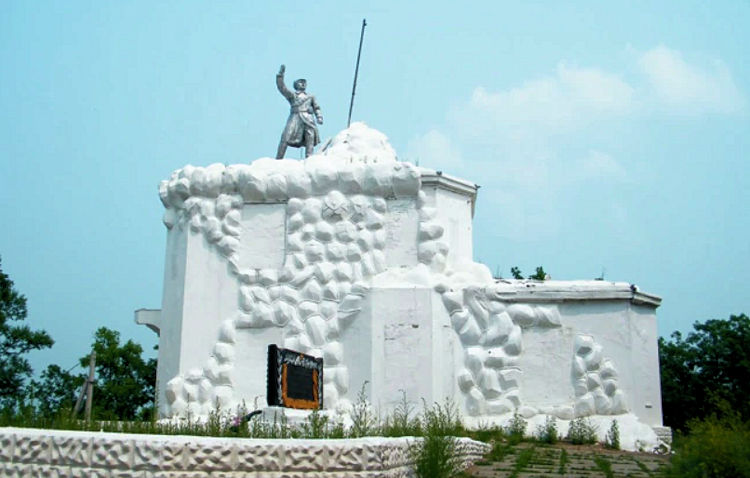
At dawn on 10 February 1922, in severe cold and deep snow, Blyukher's Red Army attacked the White positions. The Reds had 7,600 soldiers with hundreds of machine guns, 30 field guns, and two light machine gun tanks. The White Army had 4,950 soldiers equipped with 13 guns and many fewer automatic weapons. The Red attack of 10 February was repulsed with heavy losses. One of the Red tanks was knocked out a,nd the other broke down. Wounded died quickly in the -30 �C (-22 �F) temperatures. Blyukher regrouped on 11 February, then attacked again on 12 February. This time, the 3rd and 6th Regiments broke through the wire and, after fierce fighting, the Reds captured Ju-Quran Hill around noon. This rendered the White position untenable, and Molchanov retreated.
Memorial and Museum on Ju-Quran Hill
On 13 February, Molchanov's White forces retreated past Khabarovsk and the Red Army entered the city. The Red Army was too exhausted to effectively pursue the White Army, which escaped encirclement. However, White military fortunes continued on a downward path after this battle, and the last remnants of White and Japanese forces in the Far East surrendered or evacuated by 25 October 1922.
Source: Wikipedia
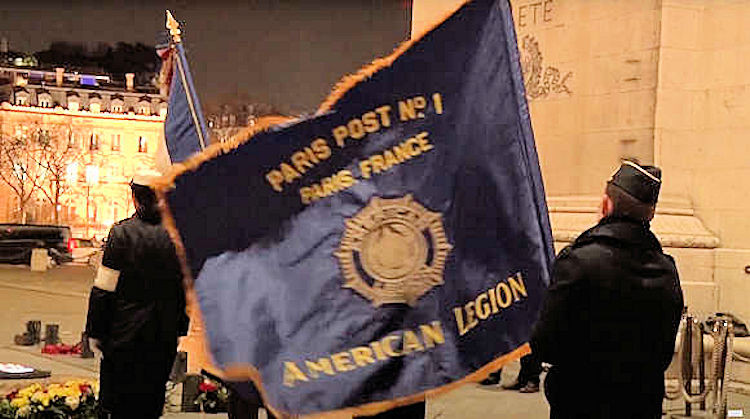
Still on Duty: American Legion Paris Post #1
At the Arc de Triomphe, Tomb of France's Unknown Soldier
The American Legion Paris Post #1, received its charter from the American Legion on 13 December 1919, as WWI weary veterans joined together to create the Legion. The American Legion Paris Post #1 is now in its 102nd year of existence in Paris, France where they continue to support veterans around the world & help keep the legacy of America's contribution to Europe alive by serving veterans and their families in France. The post actively pays respect to all American fighting men and women of the world wars and those of the Allies.
Paris Post #1 continues to support U.S. memorials and monuments whether or not they are related to the organization. They provide American representation at the many ceremonies and commemorative events involving our two nations throughout France. These include both events around greater Paris, like the daily relighting of the eternal flame at the tomb of France's Unknown Soldier, U.S. friendship events at the monuments at the Place des �tats-Unis, and Memorial and Armistice Day at the American Suresnes Cemetery, as well as at the ABMC cemeteries along the old Western Front and the advances of 1944 and '45.
Ceremony at the Post Mausoleum in Paris
After World War I, the city of Paris also granted the American Legion a small plot of land in the Cimetière de Neuilly. In the 1930s, the Paris post built a mausoleum on the site. Since then, more than 300 Paris Post #1 members have been interred there. Post members, who consider themselves guardians of the mausoleum, maintain it on behalf of their American Legion comrades who reside there in Post Everlasting. The post conducts ceremonies at the mausoleum throughout the year.
Paris Post #1 maintains an original seat on the Comit� de la Flamme, an association in charge of ceremonially reviving the Eternal Flame of the French Tomb of the Unknown Soldier located under the Arc de Triomphe. Throughout the year—and specifically on the Fourth of July—the post participates in the ravivage de la flamme, or rekindling of the flame.
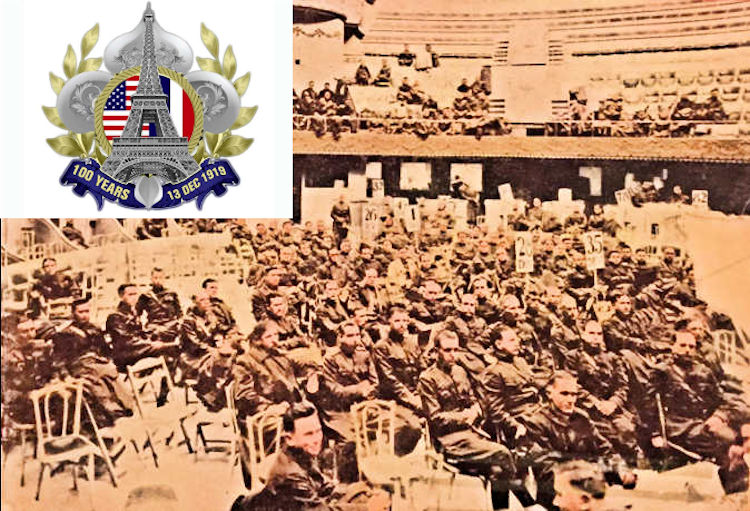
March 1919 Organizing Conference for the American Legion, Paris
Source: Doughboy Foundation
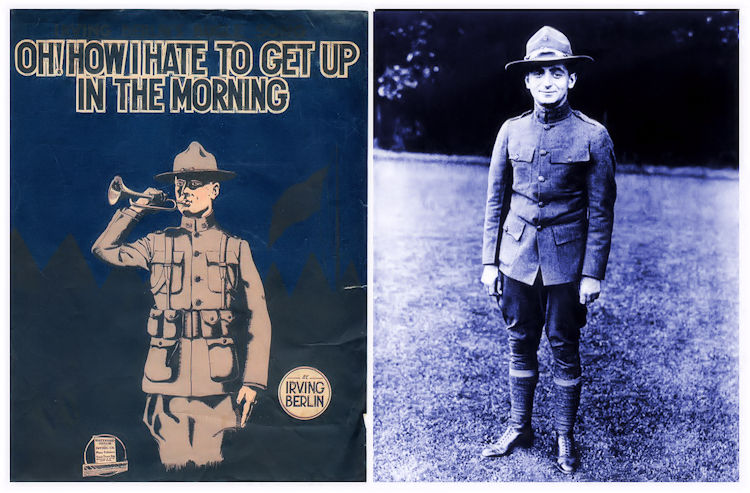
A World War One Music Video
Commentary from the Library of Congress
Oh! How I Hate To Get Up In The Morning,
Oh! How I'd love to remain in bed
For the hardest blow of all is to hear the bugler call:
'You've got to get up, you've got to get up,
You've got to get up this morning!'
Someday I'm going to murder the bugler
Someday they're going to find him dead
I'll amputate his reveille and stomp upon it heavily
And spend the rest of my life in bed!
Already a well-known songwriter when the war began, Irving Berlin, himself an immigrant whose family came from Siberia, was drafted into the U.S. Army in early 1918 and assigned to Camp Upton, located in Yaphank, Long Island, New York. There Berlin wrote a Ziegfeld-style revue featuring a cast of soldiers called Yip, Yip, Yaphank, which helped raise money to construct a camp community center. "Oh How I Hate to Get Up in the Morning," one of the show's hit tunes, expressed Berlin's distress over early morning reveille. Earlier it had been introduced by Eddie Cantor in the Ziegfeld Follies.