December |
Access |
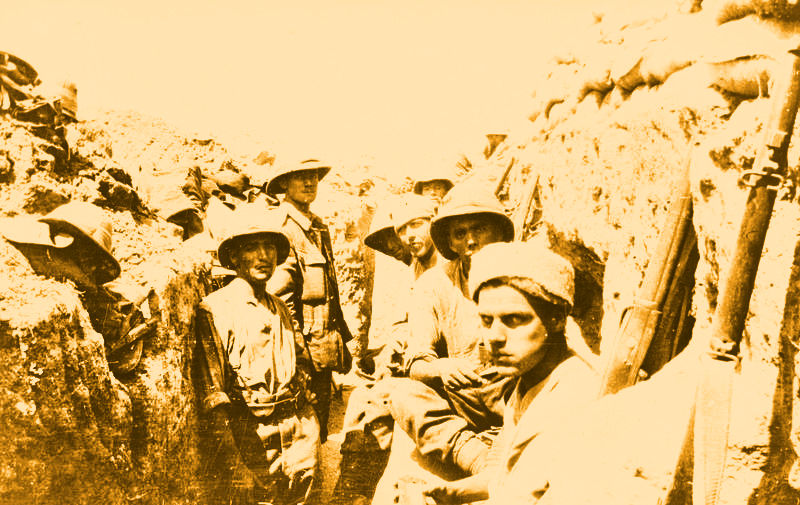
War in the Sinai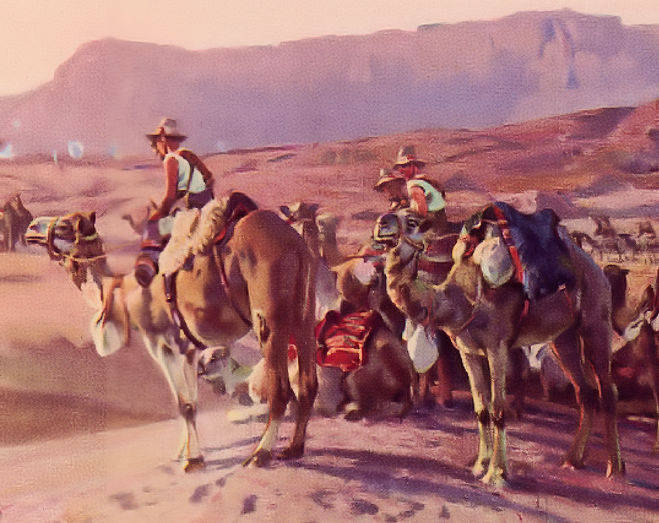 The Imperial Camel Corps at El Magdhaba,
|
||||||||

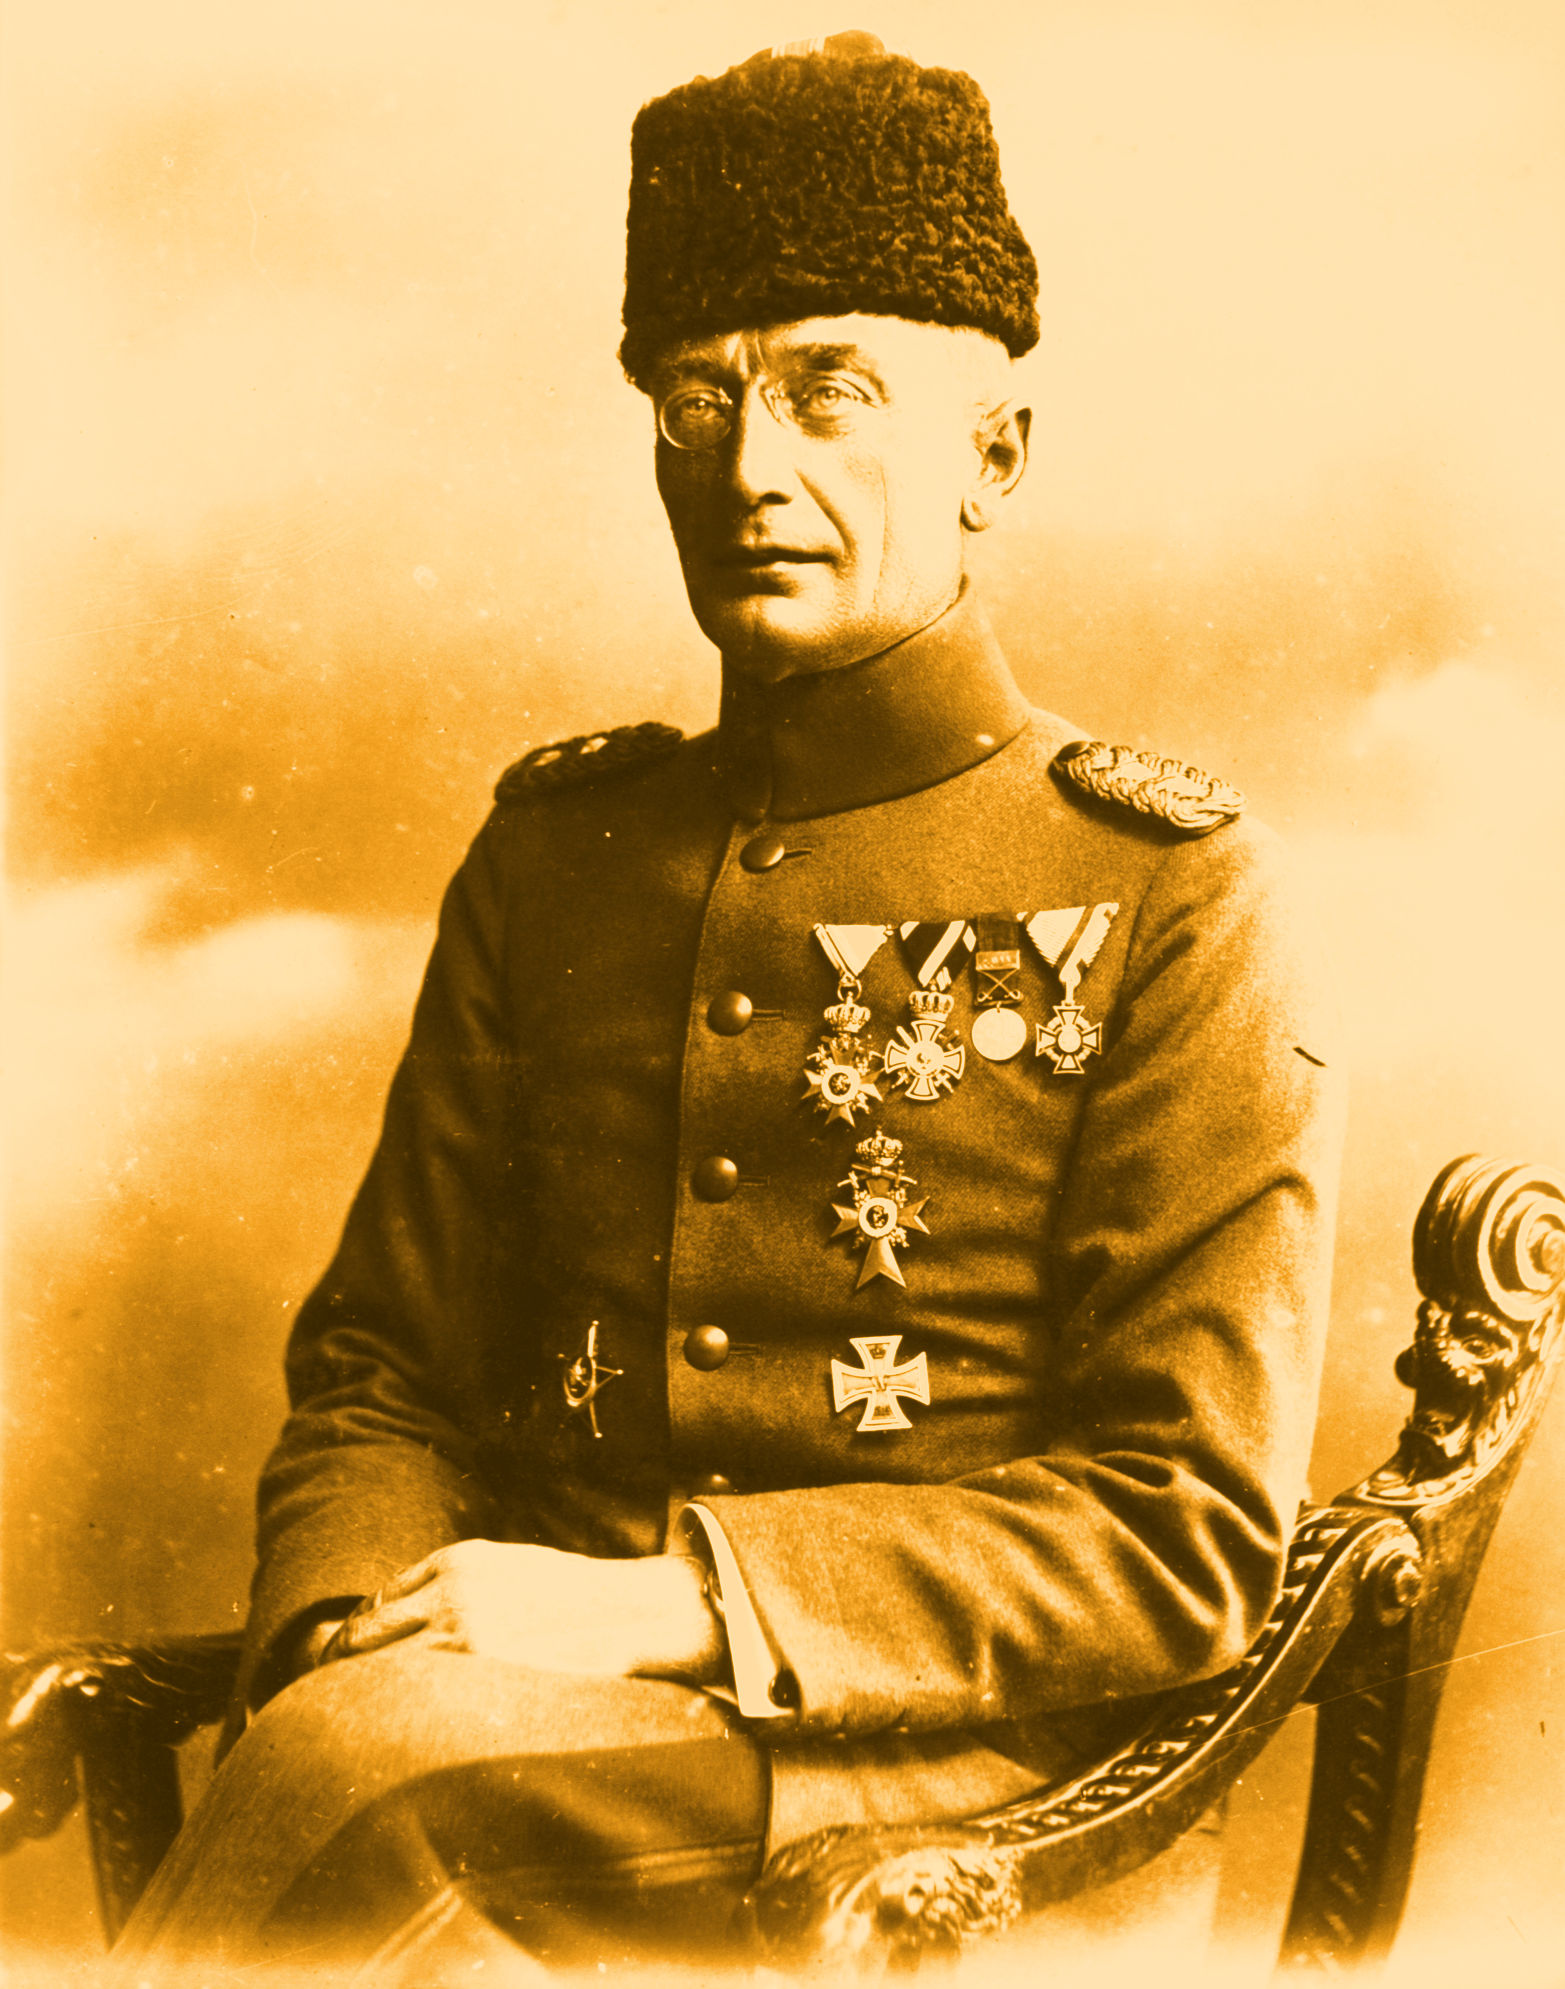
Ottoman Theater Commander
|
In the summer of 1916, as fighting raged on the Somme,
Britain's attention was firmly on the Western Front. But
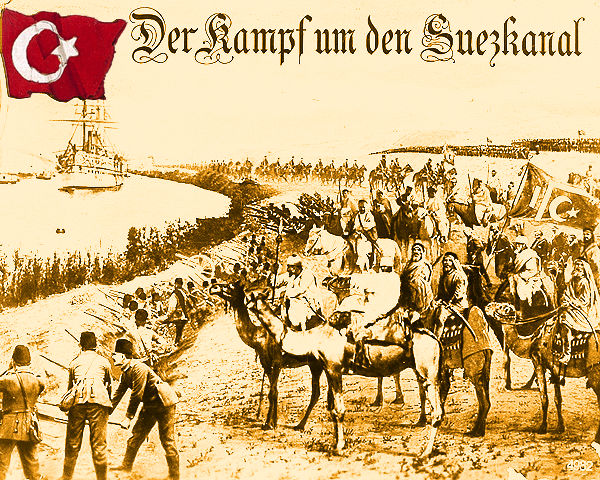
the empire faced other dangers. Ottoman Turkey,
confident after its successes in Mesopotamia and
Gallipoli, planned to close the Suez Canal to Allied
shipping and drive the British from Egypt. With the
Dardanelles secure, thousands of Turkish
reinforcements were sent south to attack Allied forces
guarding the Suez Canal. The Turks traveled to
southern Palestine, then crossed more than 50 miles of
waterless desert. At the end of their journey, they found
well-entrenched British Empire forces waiting for them.
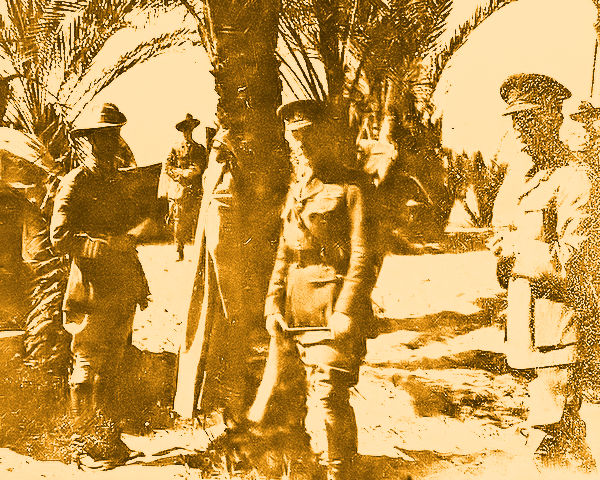
British Commander General Murray Visting a Frontline Position in the Sinai
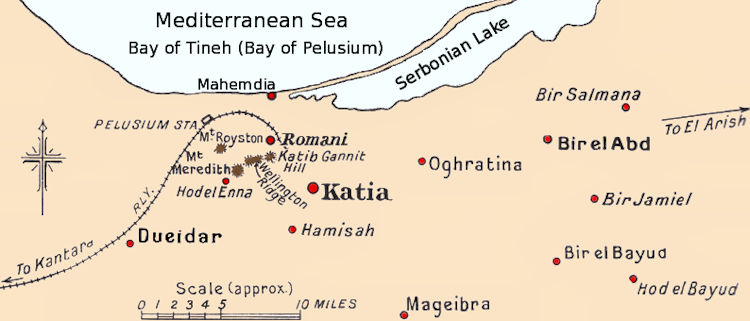
Sir Archibald Murray, commander of the Eastern and
Mediterranean Expeditionary Forces, wanted to ensure
that the battle he knew was coming would be fought on
ground of his choosing. His troops destroyed the only
large water supply on the central route across the Sinai
and established his defenses at Romani, 23 miles east of
the Suez (map below). The British force was under the command of Major General Herbert Lawrence, commanding officer of the 52nd (Lowland) Division. Garrisoned by the Australian 1st
and 2nd Light Horse Brigades, a brigade of the British
52nd Infantry Division and New Zealand mounted
troops from the Wellington Brigade and flanked by
oases and a line of high sand dunes, Romani provided
the ideal defensive location. Various other formations were moving up from or protecting the rear, including brigades of the 42nd (East Lancs) Division, the New Zealand Mounted Rifles (NZMR) Brigade, some Camel Corps troops, and the battered remains of the 5th Mounted Brigade. Lawrence would have a frontline strength of about 14,000 men for the coming fight, but would be extremely short of artillery.
For the opposing side, German Colonel Friedrich Kress von Kressenstein set out across the Sinai Desert to attack the Suez Canal in July. He had already made one attempt to cut the canal in April 1916. Acting under intense pressure from the German High Command, that attack had lacked preparations and troop numbers and had ground to a halt when it encountered the British Yeomen of the 5th Mounted Brigade around the wells at Oghratina and Katia.
While the British force had suffered crushing casualties, the Ottomans had also received a bloody nose and withdrawn. Now, they were back with the 3rd (OT) Infantry Division, consisting of the battle-hardened veterans of the 31st, 32nd, and 39th (OT) Regiments, each the equivalent to a British brigade. They were joined by large numbers of Austrian and German machine gunners and artillerymen, giving the force a far higher proportion of fire support than was usual in Ottoman formations. In all, Kress von Kressenstein mustered 16,000 men, of whom 11-12,000 were front line troops.
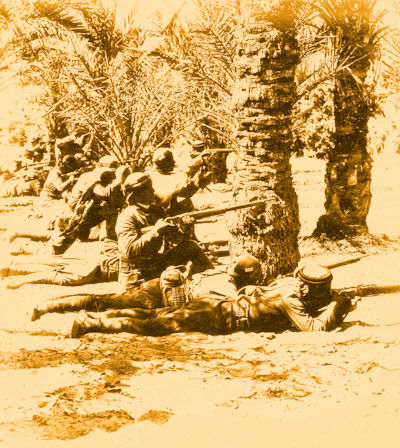
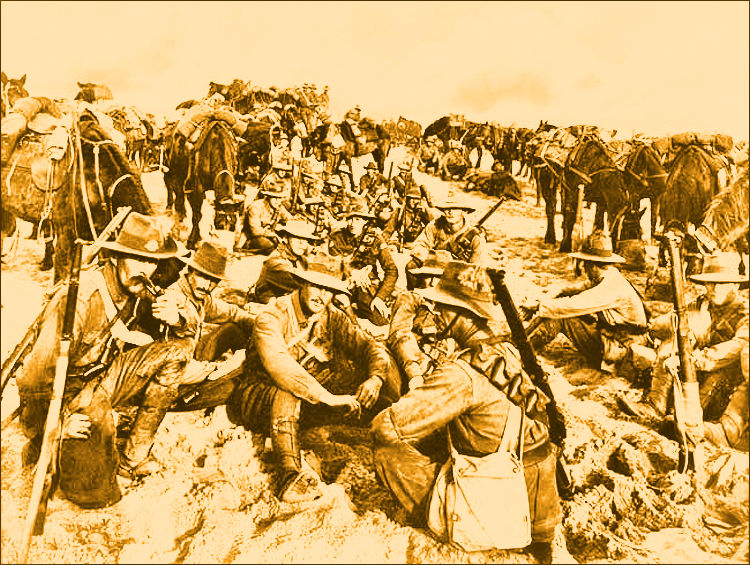
Ottoman Troops
Attacking at Katia
Since May 1916, General Lawrence had mounted
daily patrols that searched the desert for signs of
the Turkish advance. By July, as the Turks approached
Katia, seven miles east of Romani, encounters became
more common. The first of these fights came on 19 July, when
patrols of the 2nd Light Horse exchanged shots with
Turkish troops near Oghratina. Von Kressenstein was just beginning to apprehend substantial Allied forces were concentrating against him. The decisive battle of the Sinai campaign was approaching.
Sources: The Egyptian Expeditionary Force in WWI; National Army Museum; Historical Section, Australian War Memorial
Visit Our Daily Blog
Click on Image to Visit
Merry Christmas
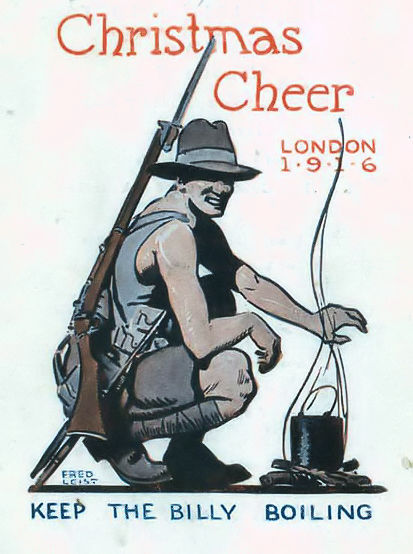
Happy 2022

Different Perspectives
Various looks at the Great War in the Sinai Peninsula.
![]() The Ottoman Empire�s campaign in the Sinai Peninsula
The Ottoman Empire�s campaign in the Sinai Peninsula
![]() The Suez Canal at War
The Suez Canal at War
![]() All About the Sinai Peninsula
All About the Sinai Peninsula
![]() Biographical Sketch of General Sir Archibald James Murray
Biographical Sketch of General Sir Archibald James Murray
![]() General Sir Harry Chauvel
General Sir Harry Chauvel
![]() The Three Battle of Gaza
The Three Battle of Gaza
![]() The Battle of Rafa
The Battle of Rafa
![]() The Mysterious Arab Bureau
The Mysterious Arab Bureau
![]() The Desert Column (Review)
The Desert Column (Review)
![]() The Imperial Camel Corps
The Imperial Camel Corps
Into the Sinai
April 1916
Laying cable through the desert to trenches. The light railway is well on its way towards completion. . . The desert is covered with dried shrubs and lizards and large rats abound. The only people we see are Indian lancers, whose duty is to patrol. Our food and water are brought up by camels, which we captured from the Turks in their last raid.
Private James Tait, East Yorkshire Regiment, Diary
Free Publications |
||
|
Amazon.com |
||
The Sinai Military Railway
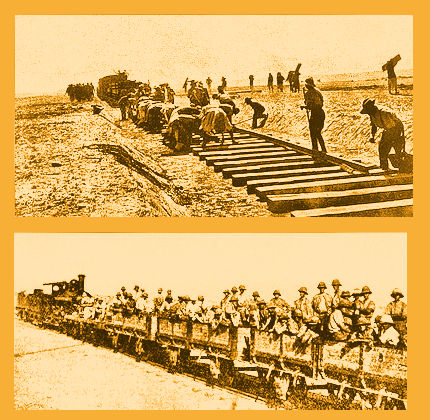
Sinai Rail Line Under Construction
and In Operation
In the spring of 1916, the Egyptian Expeditionary Force (EEF) began building a standard gauge Sinai Military Railway (SMR) north coast of the Sinai Peninsula from El Kantara on the Suez Canal across Sinai, reaching Romani by May 1916, El Arish in January 1917, and Rafah in March 1917. Water was brought across the desert by a pipeline capable of pumping over 1.5 million gallons of fresh water a day to newly built reservoirs that were built alongside the rail line. They were protected by block-houses and barbed wire entanglements.
The SMR borrowed rolling stock and 70 locomotives from Egyptian State Railways and also acquired seven small shunting locomotives. The EEF captured Beersheba in October 1917 and Gaza in November. EEF engineers extended the SMR to Deir Seneid by the end of November 1917, and a branch to Beersheba by May 1918. The line was over 300 km in length when completed.
Source: Wikipedia
Ottoman Raid at Katia
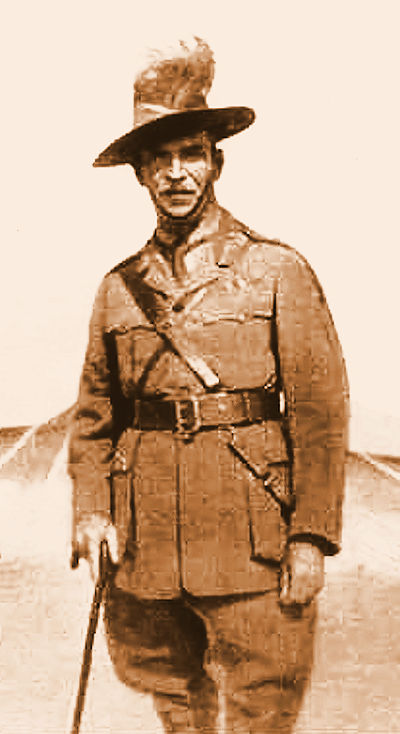
Australian Cavalry Commander Sir Harry Chauvel
April 23rd Early morning. We moved off from Salhia yesterday morning and today are again out in the desert. We hear the Turks are there. The Tommies at Kantara all crowded around us last night. They are such pink-cheeked, decent little chaps.
0715–Big news! The Turks are attacking only a few miles out. C Squadron have doubled out into the desert: we are saddling up: excitement throughout the regiment.
Midnight�Now I can write down what happened. The regiment hurried through the big Kantara camp, then on to a metalled road with the horses� hoofs striking hard and clear. Redoubts and barbed-wire entanglements were here and there, but soon the road ended and the open desert faced us.
Then came the order: �Load Rifles!� We spread out in skirmishing order and hurried straight into the desert. The reinforcements got a wee bit excited, and anyway that same strange feeling stole over me. It always comes just when I am going into action�a curious exciting thrill, tinged with a deadly coldness. The desert spread out to the white horizon, occasional sandhills drab under low prickly bushes.
We got to Hill 70 where two companies of the 4th Royal Fusiliers were quickly marching into the desert. We spread out to guard their flanks. An hour passed. Then we heard the faint bang, bang of little guns. We hurried, and Lieutenant Stanfield�s men in the screen in front caught several well-armed Turks. All hands gazed expectantly and then nearly at the top of a sand-rise there gleamed a few white tents and some camel-lines. We broke into a trot�the neddies were very willing. We drew rapidly closer�the camp looked strange!. . .
Suddenly we saw that nearly all the camels were lying in grotesque positions. They were dead. . . soon we were cantering amongst the trees and there lay British Yeomanry horses. And this we knew: it was the Tommies who had been attacked. Right amongst us were Tommies lying among the palms, not killed, just sweating men�sunburned�very tired. Some wore bandages freshly blood-stained. We plunged past a group of dirty Arab prisoners. And under the shady palms there lay wounded Tommies, gazing up at us and smiling. . . We spread out and galloped over miles of sand. But the enemy had got clean away on their camels. . .
A Yeomanry man is telling us dolefully that 5,000 Turks attacked his brigade at Katia this morning. He seemed to think the brigade is annihilated.
2030 [24 Apr.]–The wee garrison here [Bir-el-Dueidar] numbered 96, and are men of the Royal Scots Fusiliers. They put up a great fight. . . The fight yesterday lasted for five hours. The Turkish raid was utterly unexpected. The early hours were bitterly cold and a dense fog enveloped the desert. The Turks crept right up to the tiny redoubt. [The alarm was sounded by] a cheeky terrier belonging to the sentry on duty that pricked its ears and growled, then hopped up on the parapet to shield its master. . . A cloaked figure loomed gigantic out of the fog�the terrier snarled forward and a rifle-butt crushed him dead�the sentry fired and the shrouded figure pitched headlong down into the trench.
Such was their sudden awakening as the Scotties told us this morning. . .[They] had 23 men killed. . .It is all rumors yet as to what has occurred at the oasis way out on our left. The 5th Mounted Brigade was stationed out there in the big Katia oasis area, their posts at the different oases at Romani, Katia, Oghratina, and Hamisah, all a few miles apart. Five thousand Turks have attacked the scattered posts, simultaneously in the fog. The only thing certain is that of all the posts, the Scotty one at Bir-el-Dueidar is the only survivor. The others seem to be either annihilated, or their men scattered lost over the desert.
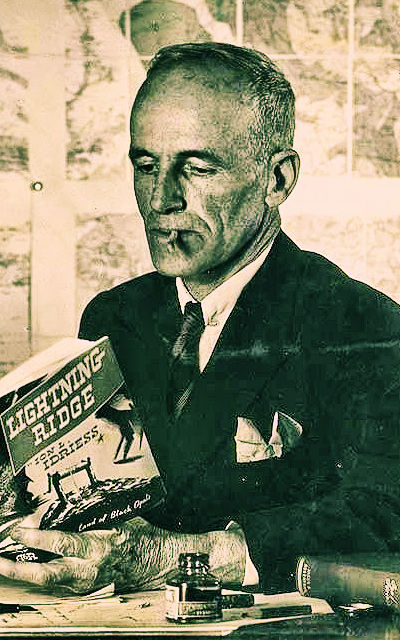
Prospector-Digger-Author Ion Idriess, 5th Australian Light Horse, Excerpt from his diary The Desert Column
The Battle of Romani, August 1916
Turning Point
Sand Dune Known as Mt. Meredith Was an Ottoman Objective
In August 1916 Turkish troops assaulted a British,
Australian, and New Zealand force in the northern Sinai.
At stake was dominance of Egypt and the vital Suez
Canal. In early August, the Turks prepared to attack.
They planned first to capture Wellington Ridge, a broad topped elevation between two high dunes called Gatib
Gannit and Mt. Meredith. Expecting to gain these
heights in the cool of night, the Turks would then sweep
down on the Etmaler and Romani camps before
reinforcements could arrive. If successful, the way to the
canal would be open.
A low quarter moon shone over the Sinai on 3 August
1916 as a Turkish force, following close behind a
returning Light Horse patrol, attempted to move up the
gullies leading to Wellington Ridge. The desert sand
reflected what little light was available, revealing the
Turkish soldiers and alerting the Australians to their
presence. In each of the gullies, small groups of Light
Horsemen waited to challenge the Turks. Unsure of the
Australians' strength, the Turkish advance guard halted
and awaited orders. They maintained their silence until
0100. Then, with the battle cries, "Allah! Allah!" and
"Finish Australia," they opened fire along the entire line.
The Light Horsemen returned fire, though neither side
had clear targets. Supported by artillery, the Turks
overran individual Light Horse posts. Other posts were
isolated, and the defenders, fighting for their lives, began the first of a series of withdrawals. Taking advantage of
the chaos and the dark, parties of Turks worked behind
the Australian defenders. Light Horsemen had to beat
Turks away from their mounts and ride, sometimes two
men to a horse, to the next defensive position. One man
wrote of his "wild ride" through rifle and machine gun
fire after holding out for two hours. Another, Major
Shanahan, carried four men through the Turkish lines
on his horse.
Mt. Meredith also came under sustained attack by
large numbers of Turkish troops. A handful of
defenders kept the attackers at bay. As dead and
wounded rolled down the slope, the living toiled their
way toward the top under heavy fire. After hours of
relentless Turkish attack, the Australians withdrew,
reforming on a ridge below the dune's summit.
Meanwhile, the Second Light Horse Regiment was
being pressed hard around Hod-el-Enna, an oasis south
of Mt. Meredith. They, too, were forced to retire and
await the reinforcements they hoped dawn would bring.
At first light, the Turks could see the thinly held
Australian line, and they poured heavy fire down upon
the defenders. At the same time, Turkish reinforcements
appeared in large numbers on the right, outflanking the
entire 1st Light Horse Brigade and enfilading both the
horse line and the led horses. Once again, the
Australians were compelled to retreat. Troops covered
each other as they fell back, at times holding the Turks
off with bayonets in fierce hand-to-hand fights. Dawn
also brought Turkish aircraft, which bombed Romani
camp and Etmaler, the railhead and headquarters of the
ANZAC Mounted Division.
The Australian commander, General Harry Chauvel,
had been hesitant to commit his reserve before dawn—he wanted Brigadier General Royston's 2nd Light Horse
Brigade intact to deal with the situation as he found it at
daylight. As the sun rose, the brigade headed toward
the beleaguered men on Wellington Ridge. Under fire
from Mt. Meredith, the ridge's defenders could not
hold out and yielded the high ground to the Turks. The
Turks had advanced all along the line but at a high cost.
With daylight, they would rue the six precious hours
that the dogged Australian defense around Wellington
Ridge had cost them. They had fought hard through
heavy sand for an objective that they had hoped to reach
unopposed in the cool darkness. Now they were
exhausted and unable to exploit their gains. As Turkish
troops lined the top of Wellington Ridge and poured fire
into the camps at Etmaler below, they were driven from
the crest by British artillery. They did not reappear until
late in the afternoon.
Key Points on the Romani Battlefield
To the northwest, the Turks were still threatening. Shortly after 0700, a Turkish infantry brigade and mounted
troops made a strong attack between Mt. Royston and
Etmaler. Within half an hour General Royston's 2nd
Light Horse Brigade was at risk of encirclement, and
Chauvel extended his line to meet the danger. Royston,
heedless of his own safety, rode along the line
encouraging his men until he was shot in the leg. Too
impatient to wait for stretcher-bearers to finish dressing
his wound, he rode off again, trailing the unfastened,
bloodstained bandage behind him. As he passed groups
of men crouching in the sand, Royston called "Keep your
heads down lads. Stick to it. Stick to it" and "We are
winning now, they are retreating in their hundreds."
One man recalled risking a look, only to see the Turks
advancing in their thousands. His exploits at Romani
that day earned Royston the nickname "Galloping Jack."
By 1000, most movement along the line had ceased.
The blazing sun beat down on attackers and defenders
alike, sapping men's strength and leaving them
desperately thirsty. Shortly after midday, the Turks
attempted an attack on Bir Abu Diuk. The 5th Light
Horse Regiment stopped them. This would be the limit
of the Turkish advance.
Now the British Empire forces took the offensive. Major
General Chaytor's New Zealand mounted troops and
British 5th Yeomanry Brigade launched the first counterstroke against Mt. Royston. Resisting strongly from
deep folds in the ground that surrounded the hill, the
Turks fought hard until the New Zealanders gained the
crest in the evening. Then the Turks began to surrender.
The prisoners were in a terrible state; they had marched
and fought all night, were running short of food and
most had long since consumed the last of their meager
water ration. Romani's defenders were equally
exhausted. Many Light Horsemen had spent 20 hours in
the firing line and gone two nights without sleep. They
had been exposed to the scorching sun all day, making
quick advances and conducting fighting retreats over
loose sand with only a quart of water each. But, being
right on their own camps, they were far better off than
the Turks. Most important, they knew now that they
were winning the battle. With the men on both sides
spent from hours of combat, there was little fighting as
the day drew to a close. The British Empire forces,
however, had many fresh troops to join the battle when
it resumed in the morning. At 0400, Allied troops moved into the attack. They quickly reached the top of
Wellington Ridge. The main body of Turks, assembled
between the ridge and Mt. Meredith, quickly
surrendered when they saw the forces arrayed against
them. As the fight continued, more Turks gave
themselves up or retreated toward Katia in large
numbers.
Australia's Light Horse Played a Key Role at Romani
British Empire troops pursued the Turks across the
desert, now thickly strewn with discarded arms and
equipment. Hundreds of stragglers were turned around
and sent toward Romani and captivity. Having seen
the tired and demoralized men drifting in from the east,
Allied commanders were confident that the remaining
Turks could also be overtaken and captured. They were
surprised to find that Turkish reserves in Katia, fighting
from well-constructed defensive positions, could not be
dislodged. Unable to break through, Chauvel ordered
his men back to Romani. They arrived at midnight on 5 August. By then, many of the horses had been 60 hours
without water. After the fight at Katia, the Turks were
ordered back to Oghratina and then Bir el Abd, 22 miles
east of Romani on the track to El Arish. Chauvel's
exhausted troops launched another attack but could not
breach the Turkish defenses. The Allies withdrew to
Oghratina. The battle for Romani was over.
In five days of fighting, over 4,000 Turkish soldiers and
25 Germans—mostly officers—had been killed or
wounded. Another 3,390 Turks were taken prisoner.
More than 200 men on the Allied side were dead and
almost 900 wounded. It had been a decisive victory. The
Suez was safe and the Turks would never regain the
initiative in the Middle East. Their approach to Romani
had been strong and well planned, but within days they
were driven from the western Sinai with less than half
of their total force still intact. The victory gave Allied
high command reason to consider the possibilities of a
more aggressive strategy in the Middle East. Within a
few weeks, they moved against El Arish, beginning the
campaign that would end two years later with the
Turkish surrender at Aleppo.
Removing the Final Sinai Outposts
El Arish, El Magdhaba, and Rafa
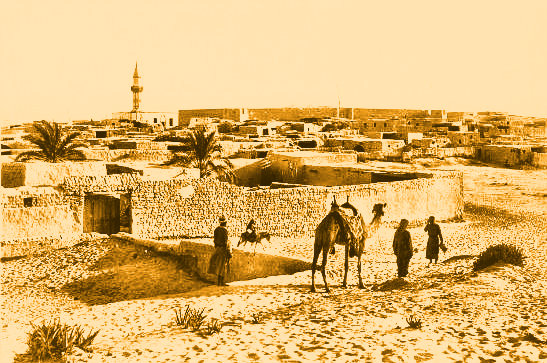
El Arish, Abandoned
The German Defenses
Following the defeat of the Ottoman advance at Romani, in accordance with his defense-of-the-canal-at-a-distance strategy, Murray ordered his forces to continue the advance eastwards to the boundary of the Sinai Peninsula. This could only be achieved at the rate of construction of the coastal rail line and the parallel water pipeline given raids and spoiling tactics by the enemy. Leading the British advance was the "Desert Column" commanded by General Sir Philip Chetwode. Four months were required to complete the next 60 miles of infrastructure. By the end of November 1916, the EEF was positioned before the largest town on the Sinai, El Arish, where Turkish and German troops were dug in. It was time for organized fighting to resume.
On 20 December, General Murray gave orders to capture El Arish, the largest town in Sinai, planning to eventually push on from there to Rafah. The Turkish garrison there had noted the methodical advance of British infrastructure by aerial reconnaissance and knew that British naval dominance in the Mediterranean rendered them vulnerable from the sea, as well. That same day, the Turks abandoned El Arish, with some heading back east toward Rafah and the Turkish border, and others heading south and east toward Magdhaba, out of the range of British naval guns and water supplies. British planes spotted the evacuation, so the plans to capture the town by force were not needed. On 21 December, ANZAC cavalry units entered the town, and British engineers soon began improving the port to serve as an advance base for the British in the Sinai.
Magdhaba, an outpost 22 miles southeast of El Arish, was the scene of a subsequent action fought on 23 December 1916 when Turkish forces threatening the southern flank of the advancing EEF were attacked by Major General Harry Chauvel's ANZAC Mounted Division, which had the Imperial Camel Corps attached. The attack required a quick victory as Chauvel's men would be operating over 23 miles from the closest source of water.
On the 22nd, as Chauvel was receiving his orders, the commander of the Turkish "Desert Force," General Freiherr Kress von Kressenstein visited Magdhaba. Though Magdhaba was now in advance of the main Turkish lines, Kressenstein felt required to defend it as the garrison, the 2nd and 3rd battalions of the 80th Regiment, consisted of locally recruited Arabs. Numbering over 1,400 men and commanded by Khadir Bey, the garrison was supported by four old mountain guns and a small camel squadron. Assessing the situation, Kressenstein departed that evening satisfied with the town's defenses.
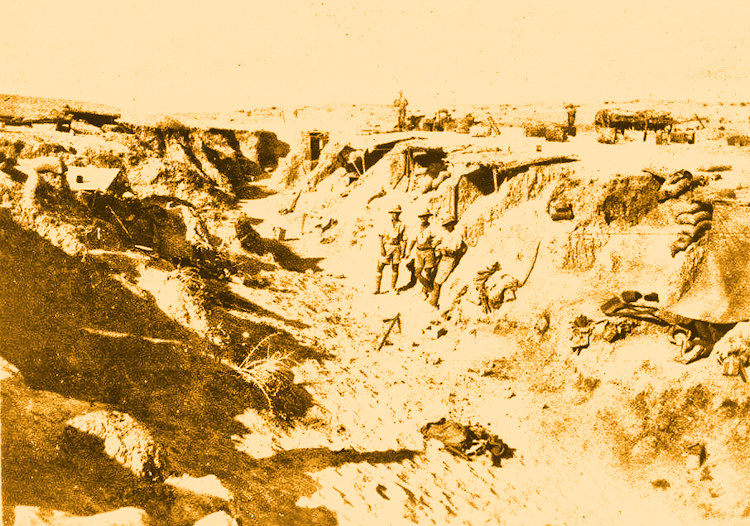
Captured Strong Point
When he arrived, Chauvel found that the defenders had constructed five redoubts to protect the town. Deploying his troops, Chauvel planned to attack from the north and east and to prevent the defenders from escaping, a Light Horse regiment. was sent southeast of the town. The 1st Australian Light Horse was placed in reserve along the Wadi El Arish. As the attack unfolded, it was met by surprisingly heavy artillery and machine gun fire. The frontal assault soon stalled with Chauvel's men pinned down on all fronts by heavy enemy fire. Lacking heavy artillery support to break the deadlock and concerned about his water supply, Chauvel contemplated breaking off the attack and went so far as to request permission from
his immediate superior to break off the attack.
Nevertheless, the success in this hard-fought action was secured through a resolute assault with the bayonet by the 1st Light Horse Brigade, commanded by Brigadier Charles Cox, just as Chauvel ordered his force to withdraw. A mounted charge by the 10th Light Horse to secure vital water supplies nearby was also a vital contributory factor in the victory.
Encouraged by the apparent ease with which the garrison at Magdhaba had been destroyed, General Murray and his staff now decided to mount a raid against the last significant Ottoman presence in the Sinai—the Ottoman garrison at Rafah. This involved much more risk than the attack on Magdhaba because Rafah was connected by road to Gaza, where the bulk of the Ottoman Fourth Army was gathering and the Sinai railway had not yet advanced far enough to allow large numbers of infantry to be brought across the desert from El Arish to attack Rafah. The British would once again have to rely on their mounted troops.
On 7 January 1917, the Anzac Mounted Division was ordered to assemble at Sheikh Zowaiid, 16 km from Rafah, to prepare for the attack. The commander of the EEF raiding force, General Philip Chetwode, also had at his disposal the British 5th Mounted Brigade, the Imperial Camel Corps Brigade, and a small British armored car detachment. Against this force the Ottoman Turkish garrison could muster three battalions of the 31st Infantry Regiment, a mountain artillery battery (four guns), and small cavalry and camelry detachments—a total strength of just over 2000 men. These troops were well entrenched just southwest of Rafah village, occupying a large earthen fort complex known as "the Reduit" which was protected by a semi-circle of three separate trench systems. There was little natural cover in the approaches to these defenses and Ottoman machine gun nests were well sited with good fields of fire. The only positive feature from the attackers� point of view was the complete absence of barbed wire surrounding them.
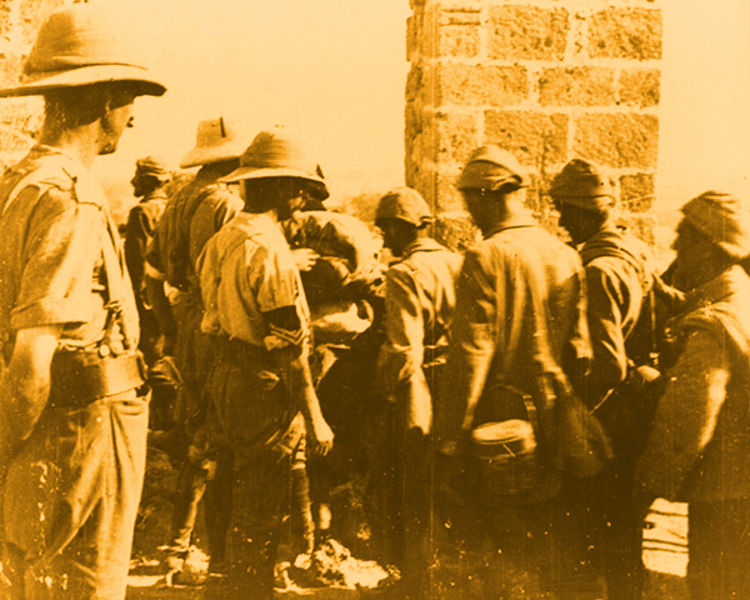
Ottoman Prisoners
After two days of preparation and reconnaissance, Chetwode�s force was ready to launch its attack. In the early hours of 9 January, his troops moved out under cover of darkness. The basic plan called for the complete and rapid encirclement of Rafah by horsemen and cameleers, followed by simultaneous assaults from all sides. The New Zealand Mounted Rifles Brigade was charged with carrying out the most daring part of this plan: sweeping around behind Rafah in a wide arc to cut it off from the road to Khan Yunis and Gaza, then attacking the Reduit from the rear.
Once all the mounted brigades were in position, the attack began at 0930. A half-hour artillery bombardment was followed by the first assaults on the Ottoman trenches. Most of the attacking troops had dismounted about 600 meters from the Ottoman lines. It quickly became clear that crossing this gap and overrunning the defenses would be no easy task. By midday, the attackers were more or less pinned down by the relentless artillery, machine gun and rifle fire. As the afternoon wore on the attackers made only slow progress in reaching and reducing the defenses, with the Ottoman Turks resisting fiercely. By now the danger that an Ottoman relief force would arrive from Gaza was increasing. Sure enough, just after 1600, scouts reported that Turkish infantry were advancing, Chetwode reluctantly decided that he had no choice but to call off the attack and retreat.
Just as Chetwode began to issue the order to retreat, the New Zealanders, who had swept through Rafah village that morning and been engaged in the fight for the Reduit and a small hill known as Point 265 ever since, finally broke through the Ottoman defenses. With two bayonet charges, they crossed the last of the open ground and captured both Ottoman positions after a brief hand-to-hand fight. This opened the way for the other attacking brigades to outflank and break into the rest of the Ottoman trenches. Chetwode quickly cancelled his order, and his brigade commanders renewed their assaults. Within an hour the Ottoman defenses had been completely overrun.
The last military threat in the Sinai had been removed for the EEF. The entire Sinai was now a safety buffer for the Suez Canal. This, however, was no longer a sufficient achievement. Due to the incredible losses being experienced on the Western Front, some of the British leadership, like David Lloyd George and Winston Churchill had begun once again to look to the east to gain strategic advantages over the Central Powers. Control of the Mediteranean, securing the lines to India, and access to oil, were now priorities. In 1917 the EEF would be asked to continue the pressure against the Ottomans by pushing into Palestine. In next month's Trip-Wire, we will examine the ensuing battles for Gaza and Beersheba, when the EEF broke through to Jerusalem.
Sources: Today in World War I; New Zealand History; Australian War Memorial; ThoughtCo
100 Years Ago:
|
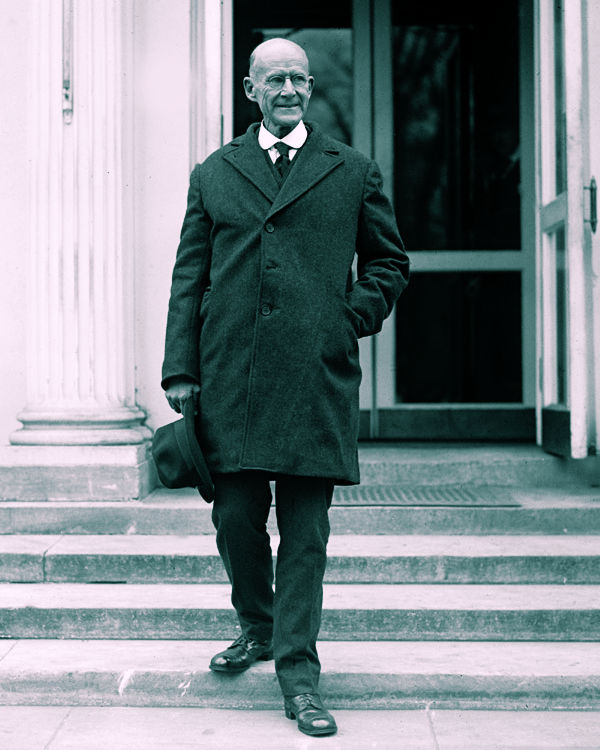
Former Presidential Candidate Eugene
|
In that speech, Debs made no reference to the war or President Woodrow Wilson�s conduct of the war. He confined his remarks to a general socialist critique of war as a product of capitalism. Nonetheless, he was convicted. The Supreme Court upheld the conviction and ten-year prison sentence in Debs v. United States (10 March 1919).
President Woodrow Wilson rejected pleas to pardon Debs after the war ended. Debs was ill while in prison, but ran for president in 1920 on the Socialist Party ticket, receiving about one million votes. Interestingly, President Harding pardoned him on the condition that he would get to meet Debs at the White House. Harding greeted him by saying, �I have heard so damned much about you.� Debs was greeted by many well-wishers at Union Station where he took the train home to Terre Haute, Indiana.
Debs spent his remaining days trying to recover his health, which was severely undermined by prison confinement. He made several speeches, wrote many articles, and finally in 1926 went to Lindlahr Sanitarium just outside of Chicago, where he died on 20 October 1926. His body was brought back to Terre Haute where it lay in state in the Terre Haute Central Labor Temple.
Sources: The Eugene Debs Foundation; Today in Civil Liberties History
Veterans—Armistice Day 2021
America's Sacrifices Remembered Around the World
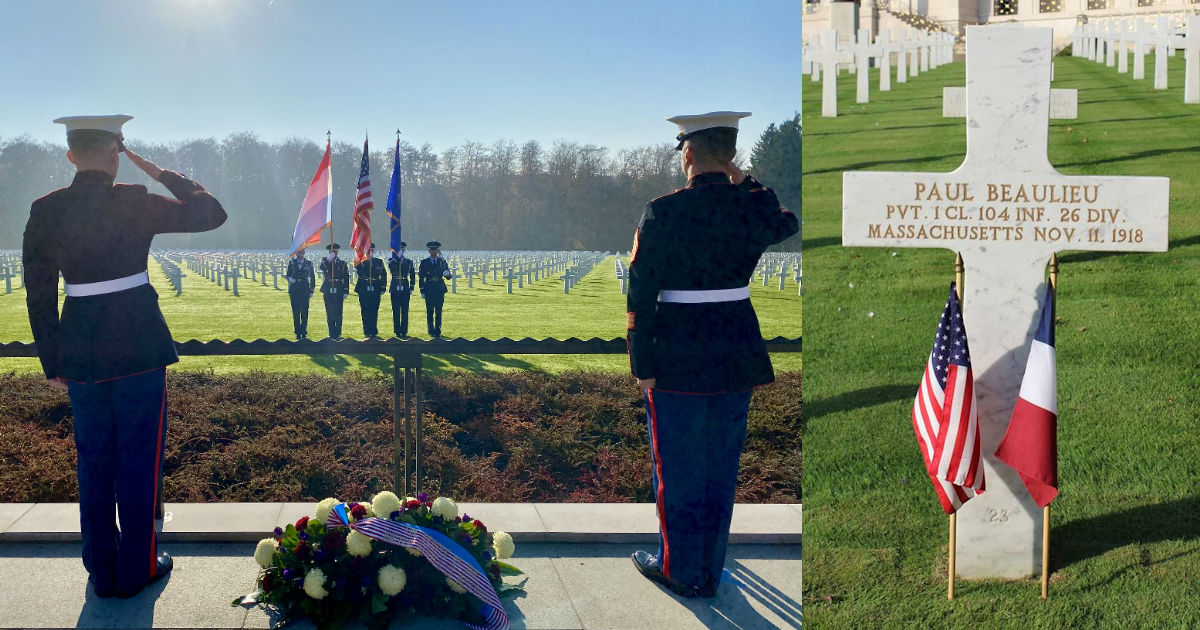
The American Battle Monuments Commission Conducted Events at All of Their Overseas Cemeteries
I thought Robert Frost's poem "A Soldier" would be a suitable complement to the photos above, even though it was written as a tribute to his British friend Edward Thomas, who was killed in the Battle of Arras in 1917. MH
Sources: ABMC, YouTube
A World War One Documentary
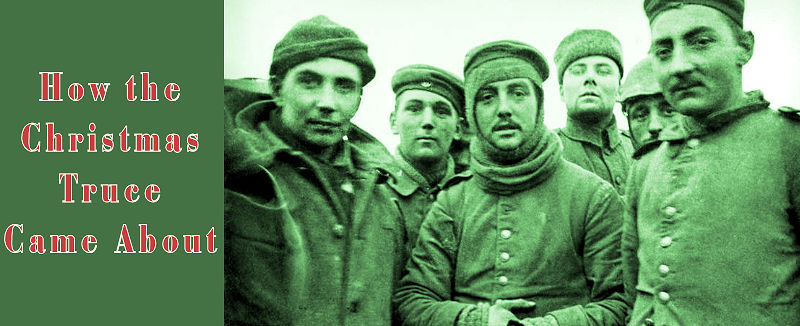
Thanks to the Imperial War Museum's massive collection of interviews with World War I veterans, this 12-minute video on how the famous Christmas Truce of 1914 came about comes to life. You feel like you're sitting in your living room chatting with the old vets. The video also has a very well-informed narration and more photos of the event than I've seen before. A favorite veteran of mine was a trooper who didn't get to France until 1915 when the style of war had changed. He was apparently intending to go to his grave refusing to believe the truce ever happened, classifying it as a far-fetched legend like the Angel of Mons. I like cranky guys, being one myself.
Sources: Imperial War Museum; YouTube

| Thanks to each and every one of you who has contributed material for this issue. Until our next issue, your editor, Mike Hanlon. |
|
|
Content © Michael E. Hanlon