Historical Notes on
The Australian Imperial Force
The Australian Imperial Force, the AIF, was raised for service overseas in the war against Germany. The 1st Infantry Division and the 1st Light Horse Brigade were to be enlisted, readied and dispatched overseas in approximately six weeks from the time war was declared.
Raised by voluntary enlistment; the AIF was to remain the only army on either side throughout the war that did not conscript. Recruiting began on 10 August, and was regionally based. This policy of drawing units from particular states, and often from particular regions or districts within a state, was also to be a feature of the AIF throughout the war.
|
Soldiers came from the full range of social, religious and economic backgrounds represented in the wider Australian population, but the original intention that half the force be drawn from men with militia training and half without does not appear to have been realised even in the early contingents. They were, however, the best paid soldiers of the war. A private in the AIF was paid five shillings a day with an additional shilling 'deferred', to be paid upon discharge. Married men were required to allot two shillings a day to dependents; a separation allowance came later, in 1915. Whilst generous by the standards of First World War armies, such conditions were not necessarily all that favourable when compared to the average wage in Australia in 1914.
|
|
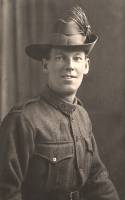
Light Horseman
|
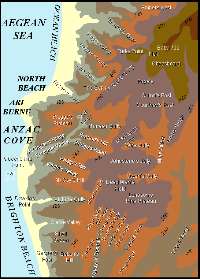
The Gallipoli peninsula
Click to zoom
|
|
Diverted to Egypt from its original destination in Britain because of a shortage of suitable accommodation and training areas, the AIF spent some months in Egypt before being committed to its first campaign on Gallipoli against the Turks. They served as part of the Mediterranean Expeditionary Force under the command of General Sir Ian Hamilton. In an eight month campaign which failed entirely to achieve its objectives, Australian and New Zealand troops at ANZAC Cove demonstrated extraordinary courage, stamina, initiative and endurance. However, the campaign was marked as well by their inexperience and inadequate training for the conditions which they faced. This was compounded by administrative bungling and incompetence at a number of higher levels. The most successful feature of a campaign which cost the AIF over 8,000 dead and 18,000 wounded was the evacuation in December; its execution was flawless and the Australians withdrew without suffering a single casualty.
|
The AIF returned to Egypt to rebuild units which had been depleted by months of combat. In early 1916 the force under went substantial expansion and reorganisation. It was divided, and for the rest of the war the Australians would fight in two widely separated theatres: France and the Middle East.
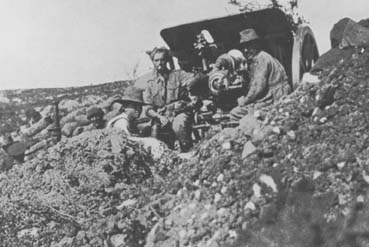 |
| Australian artillery at Gallipoli |
The light horse units stayed in Egypt under the command of Lieutenant General Sir Harry Chauvel. He had led the 1st Light Horse Brigade on Gallipoli, and with New Zealand, British and Indian units, fought a long and difficult campaign through Sinai and Palestine. The combined forces finally defeated the Turks a week or so before the end of the war in Europe in 1918.
|
Although they avoided the cataclysm of the first day on the Somme, 1 July 1916, the Australian divisions were very soon drawn in to the four month long campaign. Beginning with the diversionary attack at Fromelles by the 5th Division in which they suffered 5,533 casualties in a single twenty-four hour period, the Australians were fed in to successive attacks in which enormous casualties were sustained for minimal gains in ground. At Pozieres in July and August the remaining three divisions attacked successively and incurred 23,000 casualties for their efforts over a forty-five day period.
|
|
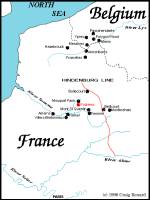
AIF on the Western Front
Click to zoom
|
In 1917 the Australians were involved principally in three major offensives. First, against the Hindenburg line at Bullecourt in April and May in which the attacking brigades incurred over 10,000 casualties. Second, at Messines in June where the 3rd Division first saw significant action as part of Godley's corps and which, while successful again, cost the Australians heavily. Third, in Haig's great attack at Third Ypres in the second half of the year, known popularly as Passchendaele. The Australian divisions made successful assaults at Polygon Wood, Menin Road and Broodseinde Ridge amongst others, but at a cost of a further 38,000 casualties.
Pulled out of the line for rest and refitting at the beginning of 1918, the Australians missed the opening stages of the great German offensive which began in March and which was designed to win the war before the Americans arrived in sufficient strength to put the matter beyond doubt. Returning to the line in April, Australian units helped blunt the German impetus, and then went over to the offensive themselves in a succession of local tactical advances dubbed 'peaceful penetration'.
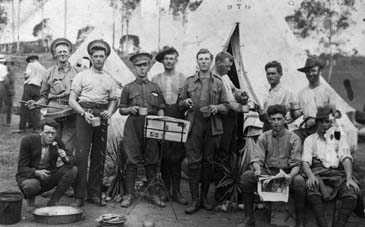 |
| AIF troops (most likely in training still at home) |
Begining at Hamel on 4 July, the new Australian Commander Monash, now showed what careful planning, controlled aggression on the part of the soldiers and the intelligent use of technical advances, especially in artillery tactics, could produce. In company with the Canadians and as a part of Rawlinson's Fourth Army, between August and October the Australian Corps took 30,000 prisoners and made impressive gains in ground. But the final allied offensives cost the AIF another 21,000 casualties and on 5 October they were withdrawn from the front for a rest, preparatory to further action in the new year. Germany's collapse and the signing of the armistice on 11 November precluded their further use.
They were repatriated to Australia in the course of 1919, the scheme supervised by Monash in London and by Chauvel in Cairo. Men were demobilised as they reached Australia, and the Australian Imperial Force officially ceased to exist on 1 April 1921. In the course of the war 416,809 men had enlisted for service overseas, of whom 331,000 actually left Australia. At the war's end there were 95,951 men in France, 17,255 serving in the Middle East, and a further 58,365 in depots, bases and hospitals in Britain. Total casualties were 58,961 dead, 166,811 battle casualties,4,098 prisoners of war and missing, 87,865 sick and 218 from other causes. It was an enormous effort, proportionately the highest casualty rate of any army in the war.
|